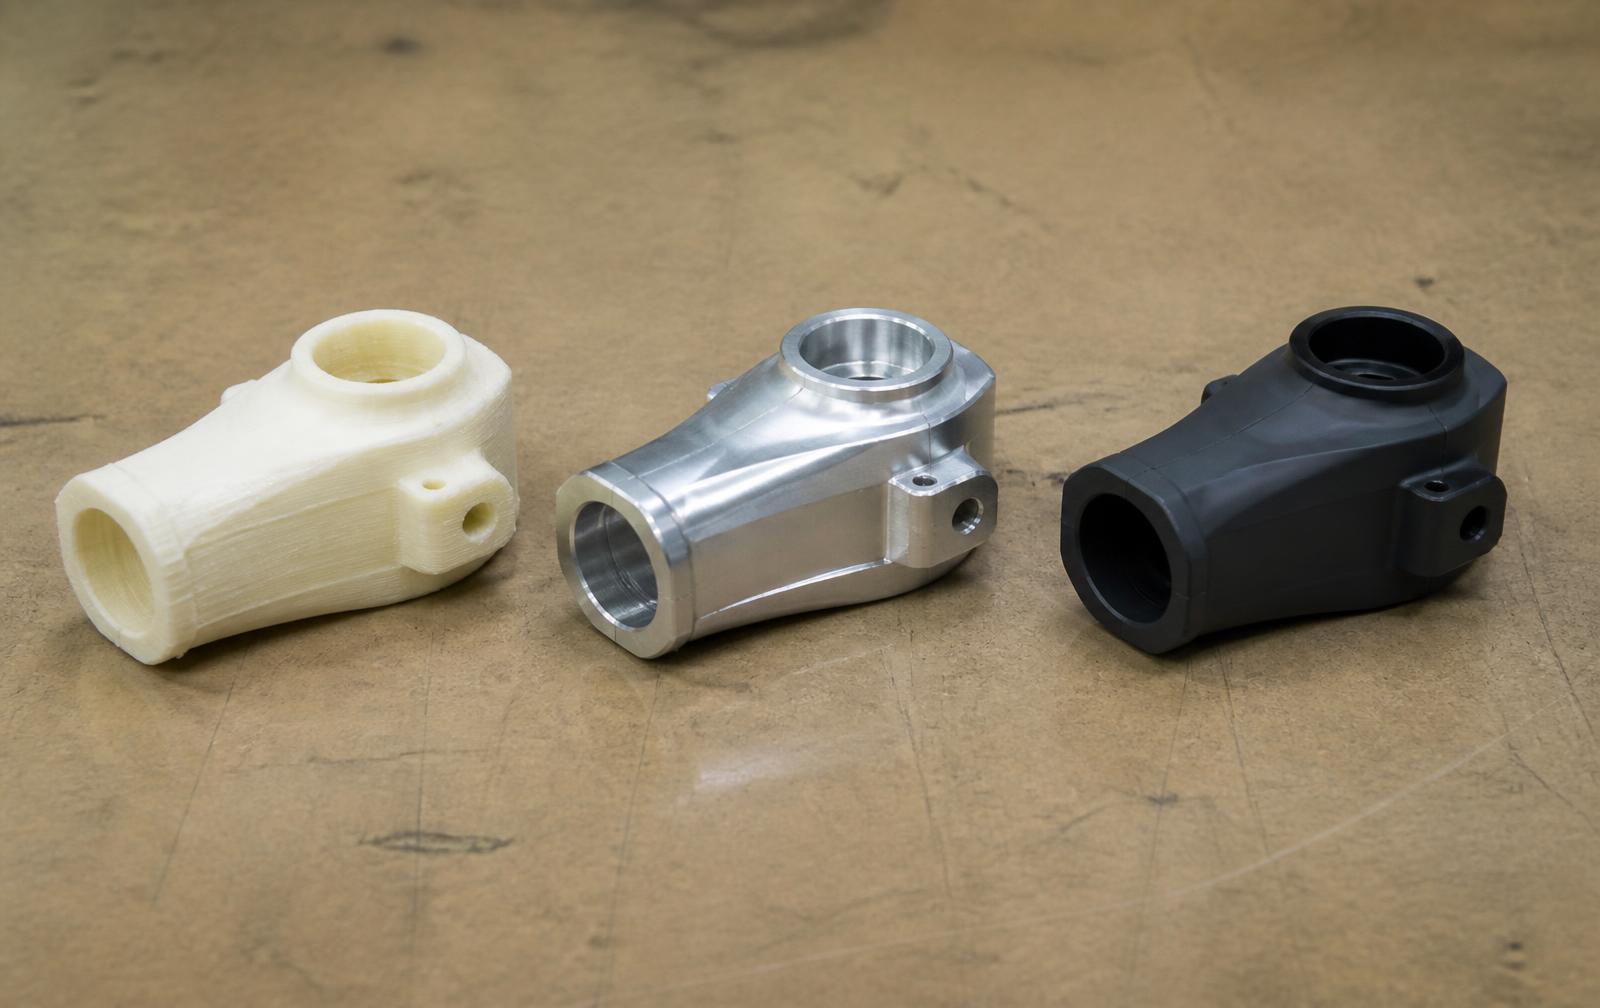
Prototype Manufacturing Process: Steps, Methods and Lead Times
How a prototype actually gets made: the six steps from CAD release to tested unit, how to pick a process, and what each route costs in time and money.
December 15, 20226 min read

Written by Ralph Hill, Mechanical & electrical systems, 3D manufacturing
Prototyping Engineer
Published December 15, 2022Updated September 2, 2026
The prototype manufacturing process turns a released CAD model into a physical unit you can test, show and iterate. Six steps, in order: release the geometry, choose the process, fabricate the parts, finish them, assemble, then test and iterate. Most schedule overruns come from skipping step two and defaulting to whatever machine is free.
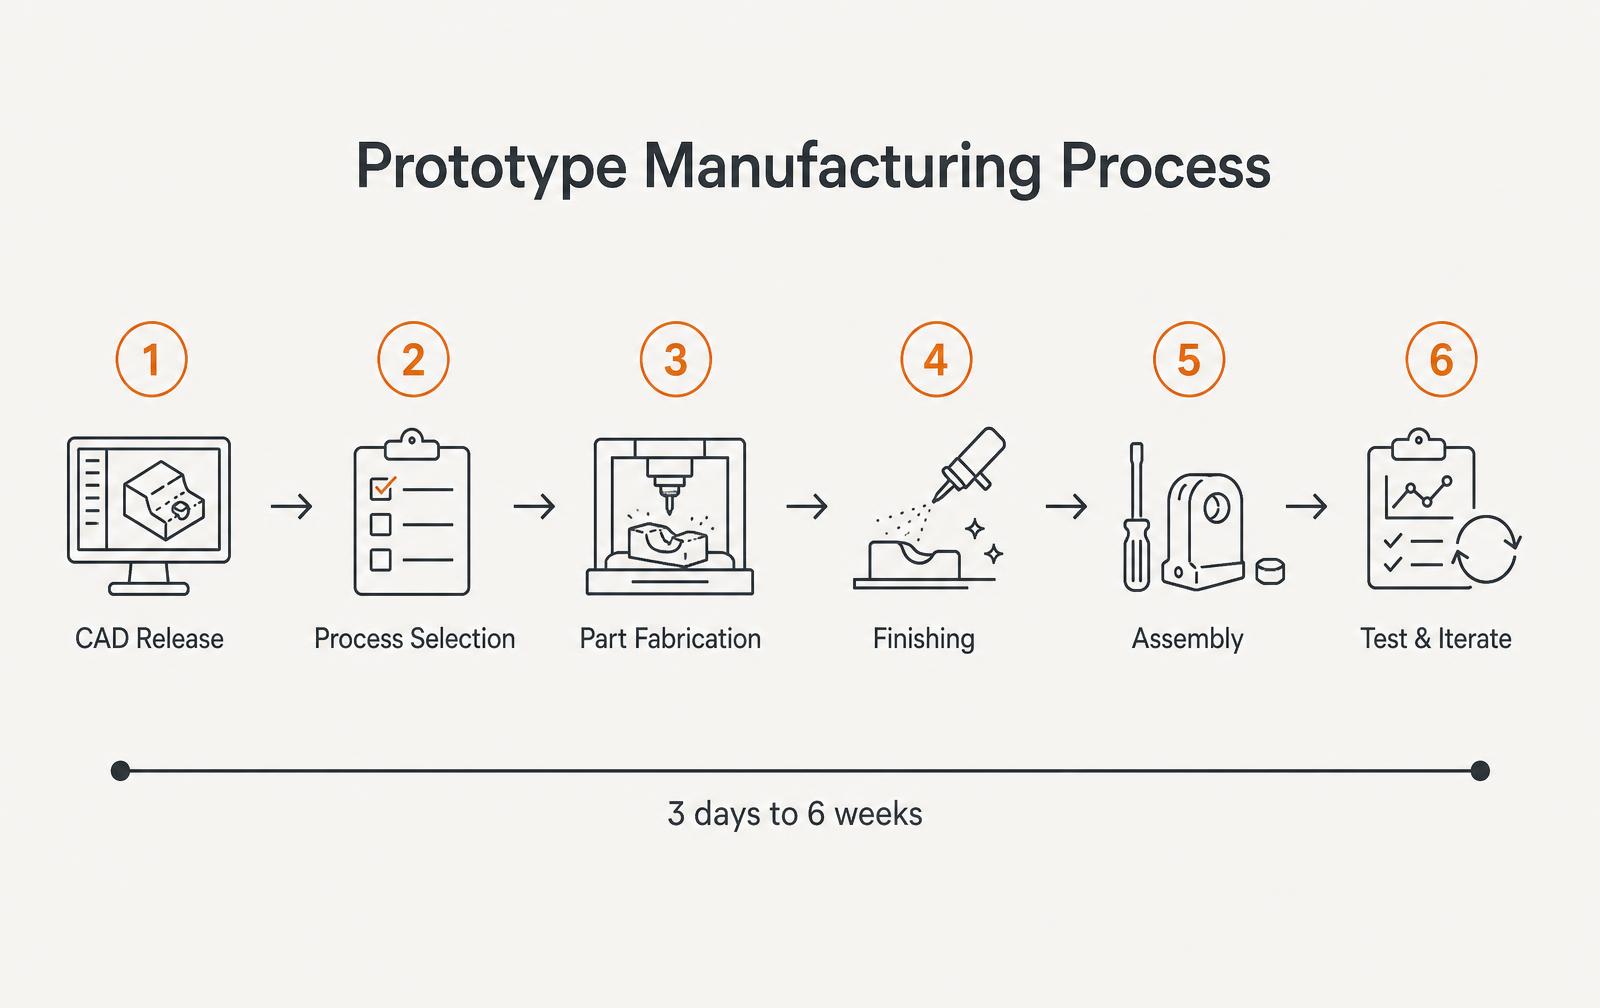
Step 1: Release the CAD
A prototype build starts from a frozen model set: solid geometry, a drawing with critical dimensions and tolerances, material and finish callouts, and a bill of materials for purchased parts. Send STEP for geometry and PDF drawings for intent. Sending only an STL guarantees a part that looks right and fits nothing.
Step 2: Choose the process
Process | Best for | Typical lead time | Typical cost per part |
|---|---|---|---|
FDM 3D printing | Fit checks, jigs, early form models | 1-3 days | $20-$200 |
SLA / DLP resin | Fine detail, smooth cosmetic parts | 2-4 days | $50-$400 |
SLS nylon | Functional parts, living hinges, snap fits | 3-6 days | $80-$600 |
CNC machining | Load-bearing metal or engineering plastic | 5-12 days | $150-$2,500 |
Urethane vacuum casting | 10-50 near-production plastic parts | 10-18 days | $60-$400 |
Sheet metal and tube | Enclosures, brackets, frames | 7-14 days | $100-$1,200 |
Soft or bridge tooling | 100-2,000 production-material parts | 3-6 weeks | $3-$60 plus tool |
Pick by the question the prototype has to answer. If the question is does it fit, print it overnight. If the question is does it survive 10,000 cycles, print nothing - machine it or cast it in the real material, because printed layers fail in ways production parts never will.
Step 3: Fabricate
- Batch parts by process, not by assembly, so each shop runs one setup.
- Order long-lead purchased items (motors, displays, seals, custom PCBAs) at the same time as the fabricated parts.
- Build two of every critical part. The second one costs 20% more and saves a week when the first is damaged in testing.
- Ask for in-process photos on machined parts so surprises appear before shipping.
Step 4: Finishing
Finishing is where prototypes gain or lose credibility. Sanding, priming and painting a printed part adds 2-5 days and $60-$400 per part but turns a visibly layered model into something you can put in front of a buyer. Functional parts often need bead blasting, anodizing, heat-set inserts or thread repair instead - cosmetic effort there is wasted money.
Step 5: Assembly
Dry-fit everything before adhesives or permanent fasteners. Record actual fits against nominal so the CAD gets corrected rather than the part getting filed down and forgotten. On electromechanical units, bench-test the electronics outside the housing first; debugging a fault inside a sealed enclosure costs a day.
Step 6: Test and iterate
Prototype round | Purpose | Typical duration | Typical cost |
|---|---|---|---|
Looks-like | Form, size, ergonomics, buyer reaction | 1-2 weeks | $1,500-$8,000 |
Works-like | Core function proven, cosmetics ignored | 2-4 weeks | $5,000-$30,000 |
Integrated alpha | Function and form in one unit | 4-8 weeks | $15,000-$80,000 |
Beta / pilot | Production materials and processes | 6-12 weeks | $30,000-$150,000 |
Two to four rounds is normal for a consumer electromechanical product. Programs that claim one round either had a very simple part or discovered the missing rounds later, at tooling. Our rapid prototyping team runs these rounds in-house and hands the result to low volume manufacturing when the design holds.
How to compress the schedule without wrecking it
- Split the build: print the non-critical shell while the critical metal part is machined.
- Freeze interfaces early - mounting points, connectors, board outline - and let cosmetics keep moving.
- Use standard fasteners and stock material sizes; custom stock adds a week for nothing.
- Keep one supplier accountable for the assembled unit rather than coordinating five shops yourself.
- Design test fixtures in parallel with the parts, not after they arrive.
What investors are actually testing at each prototype stage
A prototype raises money when it retires a specific risk an investor is worried about. A beautiful appearance model does nothing for a fund that is worried about manufacturability, and a rat's-nest breadboard does nothing for a consumer brand investor worried about whether people want the thing. Match the artifact to the doubt.
Prototype | Risk it retires | Typical cost | Time | Right audience |
|---|---|---|---|---|
Looks-like model | Will anyone want it? | $2k–$12k | 1–3 weeks | Consumer, retail buyers |
Works-like rig | Does the physics work? | $5k–$40k | 3–8 weeks | Technical diligence |
Integrated alpha | Can it be one product? | $25k–$120k | 8–16 weeks | Seed and Series A |
Engineering validation (EVT) | Can it be made repeatably? | $60k–$250k | 12–20 weeks | Growth investors |
Pilot production run | Can unit cost hold? | $100k–$500k | 16–28 weeks | Debt, retail commitments |
The metrics that travel with the prototype
- Measured bill of materials at a stated quantity, with the three line items that dominate it named.
- Test data, not adjectives: cycles to failure, runtime, accuracy, drop survival at a stated height.
- A named manufacturing path — process, likely region, tooling estimate and lead time.
- Regulatory path with the specific standards that apply and what they cost to satisfy.
- User evidence: how many people used it unassisted, and what fraction completed the core task.
- The next milestone the money buys, with a date and a definition of done.
How much of a raise a prototype should consume
A common failure pattern is spending the entire pre-seed on a single polished demo unit and having nothing left for the design-for-manufacture work that follows.
As a rough allocation for a hardware pre-seed or seed: 30–40% engineering and prototyping, 15–20% tooling deposits and manufacturing engineering, 15% testing and certification, 10% inventory deposits, and the rest runway.
If the prototype budget exceeds half the raise, either the prototype is too ambitious for the stage or the raise is too small.
Common diligence questions to prepare for
- What in this unit is hand-made, and what changes when it is made in a tool?
- Which supplier is single-sourced, and what happens if they quote a 30-week lead time?
- What is the warranty return rate you are assuming, and where does the number come from?
- What does the second version cost, and how much of this design survives into it?
- Who owns the IP created by your contractors, and is that in writing?
If you are heading into a raise, our rapid prototyping services are usually scoped around the specific risk your investors have named.
Frequently asked questions
How long does the prototype manufacturing process take?
A single printed part can be in hand in 1-3 days. A complete assembled functional prototype typically takes 3-6 weeks, and a pilot-grade unit built with production materials takes 6-12 weeks.
How much does a prototype cost to manufacture?
Simple printed or machined parts run $20-$2,500 each. A complete functional prototype of a consumer electromechanical product usually lands between $5,000 and $30,000 per round, including parts, electronics, finishing and assembly.
What files does a prototype shop need?
Send STEP files for geometry, a dimensioned PDF drawing with tolerances and critical features, material and finish specifications, quantity, and a bill of materials for purchased components. STL alone is only adequate for a rough form model.
Should a prototype use production materials?
Only when the test requires it. Form and fit rounds are fine in printed resin or nylon. Any test of strength, fatigue, chemical resistance, or regulatory performance must use the production material and, ideally, the production process.
The prototype manufacturing process, stage by stage
Prototyping is a sequence of increasingly expensive answers to increasingly specific questions. A looks-like model answers whether people want it. A works-like rig answers whether the physics holds.
An engineering prototype answers whether the assembly and the electronics behave together, and a production-intent unit answers whether the factory can build it repeatedly. Skipping a stage does not save money; it moves the discovery to the stage where changes cost ten times more.

Stage | Purpose | Method | Lead time | Cost range |
|---|---|---|---|---|
Concept model | Form, size, ergonomics | FDM or SLA print, foam | 2-5 days | $300-$2.5k |
Works-like rig | Core function on the bench | Off-the-shelf parts, dev boards | 1-3 weeks | $2k-$15k |
Engineering prototype | Integrated mechanics and electronics | SLA/SLS housings, machined parts, custom PCB | 3-6 weeks | $8k-$45k |
Production-intent | Real materials and processes | Bridge tooling, cast urethane, sheet metal | 5-10 weeks | $15k-$80k |
Pilot run | Process capability and yield | Soft or hard tooling, 50-500 units | 8-16 weeks | $30k-$250k |
Choosing a process for the question you are asking
- SLA - best surface finish for appearance models and clear parts; brittle and UV sensitive, so not for functional load testing.
- SLS nylon - tough functional parts with living hinges and snap fits; grainy finish.
- CNC machining - real engineering materials and true tolerances when you need to test fit and strength.
- Cast urethane - 25-200 units in production-like plastics from a silicone tool in 2-3 weeks.
- Bridge (aluminum) tooling - real injection molded parts in 3-5 weeks at a third the cost of steel, good for 5,000-20,000 shots.
- Sheet metal and extrusion - fast, low tooling, and often the right answer for enclosures nobody will see.
Frequently asked questions
What investors want to see in a prototype?
Investors are not buying craftsmanship; they are buying reduced risk. A prototype that demonstrates the single hardest technical claim - the sensor accuracy, the runtime, the cycle life - retires more risk than a beautiful housing.
Pair the demo with a costed bill of materials, a DFM review from a real factory, and a test report. That package converts a pitch from a story into a schedule. Key takeaway 1: Each prototype stage should answer one defined question.
Key takeaway 2: Match the process to the question - appearance, function, tolerance, or process capability. Key takeaway 3: Bridge tooling delivers production-like parts long before steel is justified. Key takeaway 4: A costed BOM and a test report make a prototype fundable.
What investors actually check when they see a prototype?
Work with LA NPDT: if you are moving from here to execution, start with our rapid prototyping services or talk to us about prototype design .
Filed under:EducationInspirationWords
Services related to this guide
- Best prototyping companiesDevelopment firms, instant-quote bureaus and local shops — who fits which job.
- Free prototype cost calculatorFive to eight questions, an instant cost range for a first prototype.
- Prototype development companiesWhich firms take a sketch to a working prototype — and which only fabricate parts.
- Rapid prototypingWorking prototypes in days, from 3D printing to vacuum casting.