How to Make a Prototype: A Step-by-Step Guide
Learn how to make a prototype the way product teams actually do it: pick the question first, build the lowest fidelity that answers it, and escalate only when the answer requires it.
March 1, 20227 min read

Written by Ralph Hill, Mechanical & electrical systems, 3D manufacturing
Prototyping Engineer
Published March 1, 2022Updated September 2, 2026
To make a prototype, define the single question the prototype must answer, choose the lowest fidelity that can answer it, build it with the fastest available method — sketch, 3D print, breadboard or clickable mockup — test it with real users, and escalate fidelity only once the answer demands it. Prototypes are experiments, not miniature products.
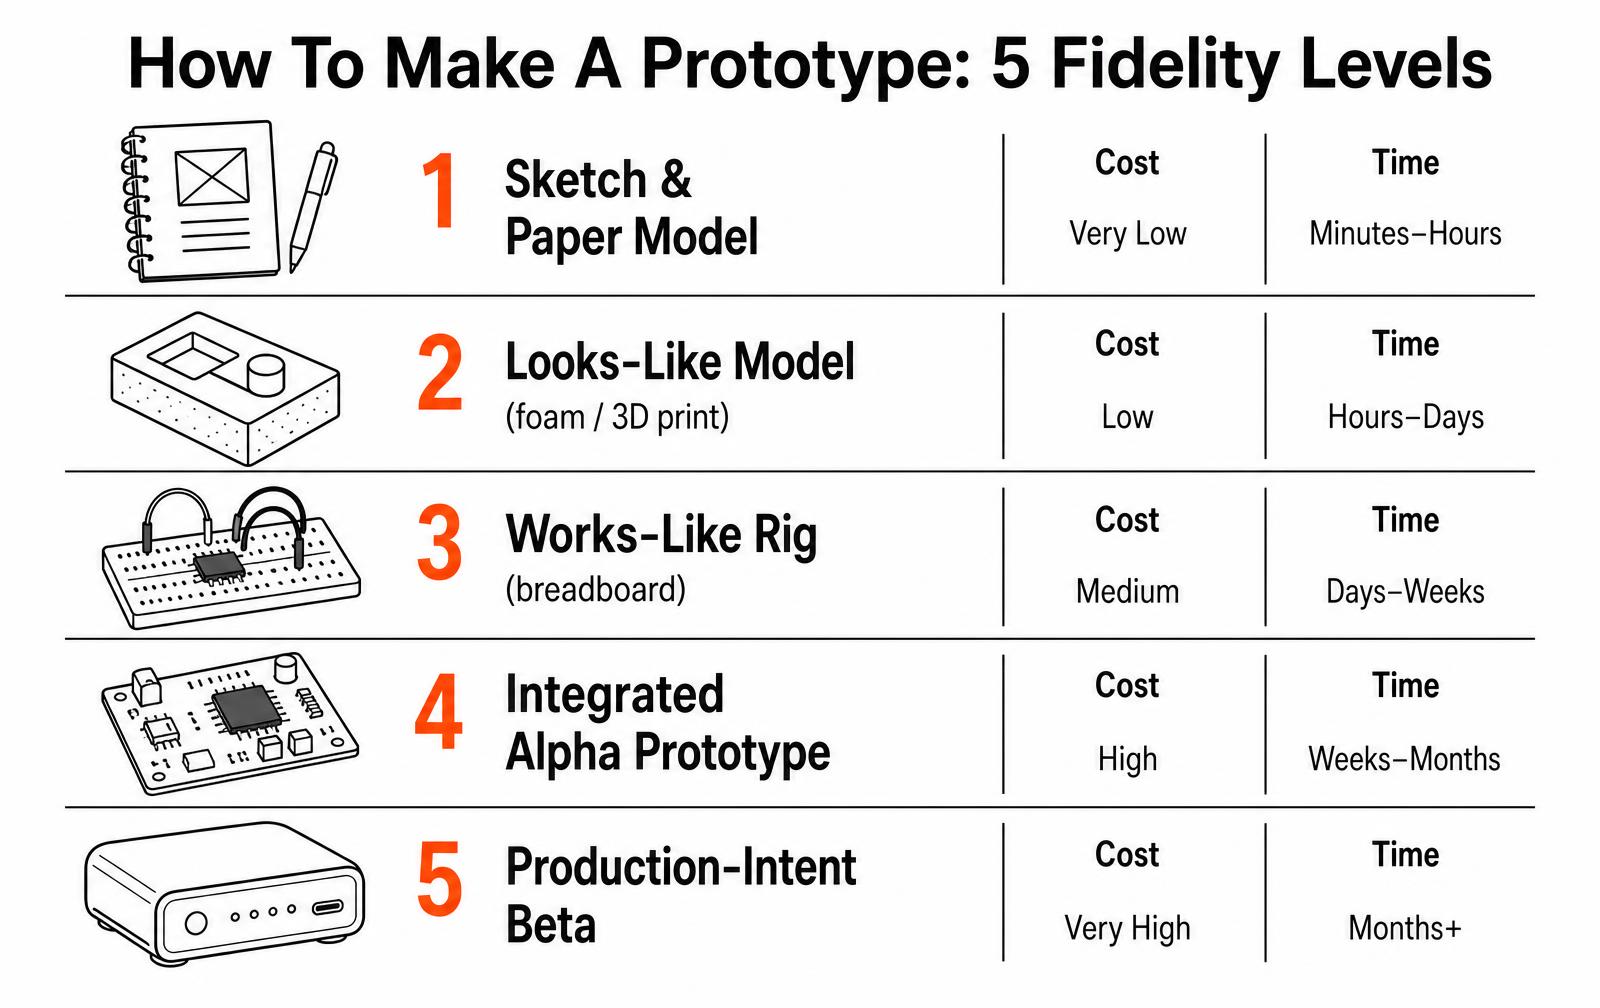
The most common and most expensive mistake is building a beautiful prototype too early. A finished-looking model invites feedback about color and stops the conversation about whether the thing works at all.
Step 1: Write down the question
Every prototype should have one sentence on top of it: what we are trying to learn. "Will the latch survive one thousand cycles?" and "Do people understand the interface without a manual?" require completely different builds. If a prototype is trying to answer four questions, it will answer none of them cleanly.
Question type | Prototype to build |
|---|---|
Does the mechanism work? | Works-like rig, ugly and oversized |
Does it feel right in the hand? | Looks-like model in foam or 3D print |
Will people understand it? | Low-fidelity mockup or clickable flow |
Can it be manufactured at cost? | Production-intent parts from real processes |
Will it survive real use? | Integrated prototype plus environmental testing |
Step 2: Choose the fidelity level
- Sketch and paper model. Minutes to hours. Kills bad directions before anyone is attached to them.
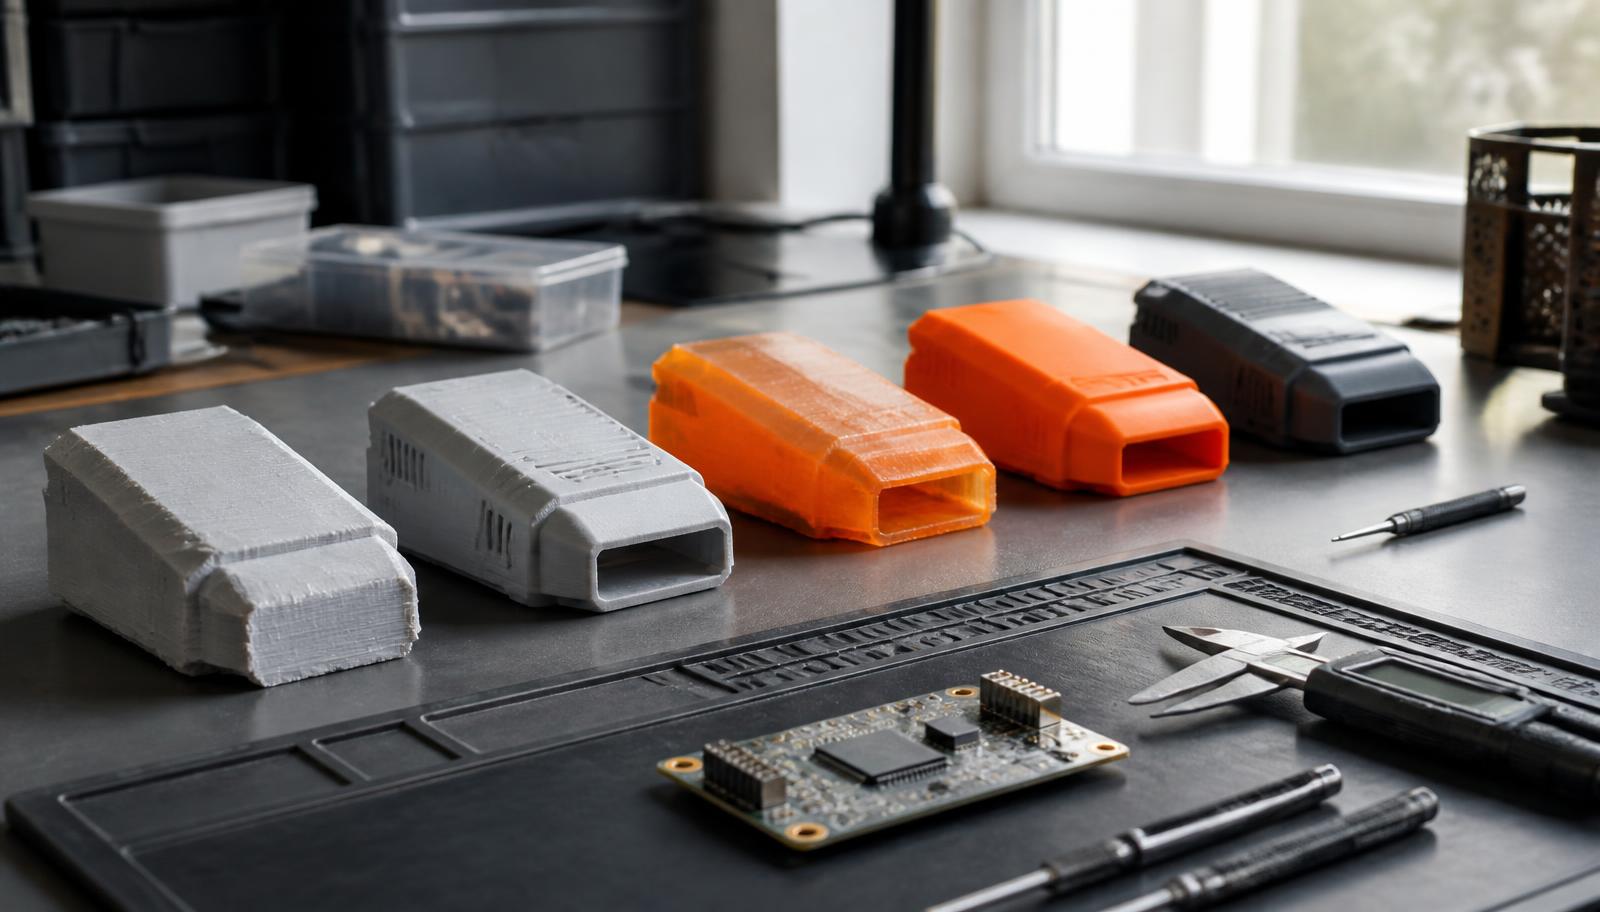
- Looks-like model. Foam, machined block or 3D print. Proves size, proportion, grip and shelf presence.
- Works-like rig. Breadboard electronics, off-the-shelf motors, laser-cut plates. Proves the mechanism or circuit.
- Integrated alpha. Real architecture in near-final materials. Proves it all fits and works together.
- Production-intent beta. Parts made by the intended process. Proves manufacturability and enables certification.
Skipping levels is possible but rarely cheaper. Most programs we run at our rapid prototyping practice go through three to five iterations before design freeze.
Step 3: Pick the method and materials
Method | Best for | Typical lead time | Typical cost per part |
|---|---|---|---|
FDM 3D printing | Fit checks, rough form, jigs | Hours to 1 day | $5 to $80 |
SLA / resin printing | Fine detail, clear parts, appearance models | 1 to 2 days | $25 to $300 |
SLS nylon | Functional, durable parts and living hinges | 2 to 4 days | $40 to $400 |
CNC machining | Metal parts, tight tolerance, real material properties | 3 to 10 days | $100 to $1,500 |
Urethane casting | 10 to 100 near-production units before tooling | 1 to 3 weeks | $50 to $400 |
Soft or bridge tooling | Hundreds of units in the real production material | 3 to 6 weeks | Tool $3k to $20k |
For electronics, start with a development board and breadboard, move to a custom PCB only once the architecture is settled, and expect two to three board revisions before production. For software or app prototypes, a clickable flow built in a design tool answers most usability questions before a line of code is written.
Step 4: Build it fast and deliberately rough
- Buy before you build — off-the-shelf motors, hinges, enclosures and dev boards save weeks.
- Oversize the first mechanical prototype; shrinking a working mechanism is easier than fixing a cramped one.
- Keep one variable per iteration so you know what caused the change in result.
- Photograph and log every build, including failures. That record becomes your design history file later.
Need a prototype built quickly and correctly?
Our in-house lab builds looks-like, works-like and production-intent prototypes, usually in one to three weeks.
Step 5: Test with the people who will use it
Give the prototype to real users with a task and no explanation, then watch silently. What they do with it in the first thirty seconds is worth more than an hour of opinions. Record where they hesitate, what they grip, what they press, and what they say aloud.
- Five to eight users surface the large majority of usability problems at any given fidelity.
- Test the failure paths too — wrong assembly order, dead battery, dropped unit.
- For functional claims, run quantitative tests: cycles, drops, thermal soak, ingress.
Step 6: Decide, iterate, escalate
Close every prototype cycle with a written decision: the question is answered and we move up in fidelity, the answer was no and we change direction, or the test was inconclusive and we rebuild the experiment. Prototype cycles without decisions become expensive hobbies.
Once fidelity reaches production-intent, the work shifts into design for manufacturing and validation. See the new product development process for what follows, or the design files you need to get a prototype made externally.
What a prototype typically costs
Prototype stage | Typical total cost | Typical duration |
|---|---|---|
Sketches and paper models | Under $2,000 | Days |
Appearance model | $1,500 to $8,000 | 1 to 3 weeks |
Works-like functional rig | $3,000 to $20,000 | 2 to 6 weeks |
Integrated alpha prototype | $10,000 to $60,000 | 6 to 12 weeks |
Production-intent beta build | $25,000 to $150,000 | 8 to 20 weeks |
Not sure which prototype you need?
Send us your sketch, spec or CAD and we will tell you which fidelity actually answers your question — and what it will cost.
Frequently asked questions
How do you make a prototype step by step?
Define the one question the prototype must answer, choose the lowest fidelity that can answer it, select a method such as 3D printing, machining or breadboarding, build it quickly using off-the-shelf parts where possible, test it with real users or physical tests, then decide whether to iterate, change direction or escalate fidelity.
How much does it cost to make a prototype?
A simple appearance model typically costs $1,500 to $8,000, a functional works-like prototype $3,000 to $20,000, and a production-intent build $25,000 to $150,000. Single 3D printed parts range from about $5 to $300 depending on process and detail.
How long does it take to build a prototype?
A basic 3D printed model can be produced in a day. A functional prototype usually takes two to six weeks, and a production-intent prototype eight to twenty weeks including part sourcing and assembly.
What is the difference between a looks-like and a works-like prototype?
A looks-like model represents form, size, weight and finish but does not function. A works-like prototype proves the mechanism or electronics and usually looks nothing like the final product. They are combined into one integrated prototype only later, once both have been proven separately.
Can I make a prototype myself?
Early fidelity levels, yes — sketches, cardboard models, desktop 3D prints and breadboard electronics are all accessible. Integrated and production-intent prototypes generally require CAD, design for manufacturing knowledge and access to processes such as CNC machining, urethane casting or bridge tooling.
Do I need a patent before making a prototype?
No. Building a prototype does not forfeit rights, and prototypes often improve a patent application by revealing what is actually novel. If you plan to show it publicly or to potential partners, file a provisional application or use a signed NDA first.
Start with the question, not the process
The most expensive prototyping mistake is building a beautiful model that answers a question nobody asked. Every prototype should be commissioned to resolve one specific uncertainty: does it fit the hand, does the mechanism survive 10,000 cycles, will the board fit inside, will a buyer pay for it. Once the question is written down, the right process and the right level of finish are usually obvious — and often cheaper than expected.
Question you need answered | Right prototype | Fidelity | Typical spend |
|---|---|---|---|
Is the concept understandable? | Sketch model in foam or cardboard | Low | Under $200 |
Does it fit the hand and the space? | 3D-printed form study | Low-medium | $150-$800 |
Does the mechanism work? | Functional rig, off-the-shelf parts | Medium | $500-$4,000 |
Does the electronics package fit? | Printed enclosure with real boards | Medium-high | $1,500-$8,000 |
Will people buy it? | Appearance model, painted and finished | High | $3,000-$15,000 |
Will it survive real use? | Engineering prototype in production-like material | High | $8,000-$40,000 |
Choosing a fabrication process
Process selection comes down to three variables: how the part must behave, how many you need, and how fast. The table below covers what a first prototype is realistically made from.
Process | Lead time | Cost per part | Material realism | Best for |
|---|---|---|---|---|
FDM 3D printing | Same day - 2 days | $5-$80 | Low | Fit checks, quick iterations |
SLA / resin printing | 1-3 days | $25-$300 | Medium, brittle | Fine detail, appearance |
SLS nylon | 3-5 days | $40-$500 | Good, functional | Living hinges, snap fits, ducts |
MJF nylon | 3-5 days | $40-$600 | Good, isotropic | Small production runs |
CNC machining | 5-10 days | $120-$2,000 | Exact material | Structural and thermal testing |
Cast urethane | 10-15 days | $60-$400 at 20-50 units | Close to injection moulding | Pilot runs, user trials |
Bridge tooling (aluminium) | 3-5 weeks | $3k-$15k tool | Production material | Hundreds to low thousands |
A staged sequence that keeps cost proportional to certainty
Prototype in stages, and let each stage earn the next. Teams that jump straight to a finished appearance model spend the budget before they know what the product is.
- Stage 1 — Rough form: foam, cardboard or fast FDM prints. Goal is size, proportion and grip. One or two days, minimal cost.
- Stage 2 — Works-like rig: the mechanism or electronics function, ugly and oversized, often on a breadboard or laser-cut plate. Goal is proving physics.
- Stage 3 — Looks-like model: correct geometry, surface finish and colour, no working internals. Goal is user reaction and stakeholder buy-in.
- Stage 4 — Integrated engineering prototype: works-like and looks-like combined, in materials close to production. Goal is verification testing.
- Stage 5 — Pilot units: cast urethane or bridge-tooled parts, assembled by the process you intend to use. Goal is proving the process, not the product.
What each stage should cost and take
Stage | Duration | Cost range | Exit criterion |
|---|---|---|---|
Rough form | 2-5 days | $100-$1,000 | Size and ergonomics agreed |
Works-like rig | 2-5 weeks | $3k-$25k | Core function demonstrated |
Looks-like model | 2-4 weeks | $3k-$15k | Design approved by decision maker |
Engineering prototype | 6-12 weeks | $15k-$80k | Passes internal test protocol |
Pilot units | 6-10 weeks | $10k-$60k | Assembly time and yield measured |
Digital products: the same logic, different materials
For an app or connected service, the fidelity ladder runs from paper sketches to clickable Figma flows to a coded prototype on real hardware. The rule is unchanged: build the lowest-fidelity artefact that can answer the open question. A clickable flow tested with five users finds most navigation problems in an afternoon; a coded prototype is only worth building once the interaction model has survived that test and the remaining risk is technical.
Artefact | Build time | Answers | Does not answer |
|---|---|---|---|
Paper sketch flow | Hours | Is the concept clear? | Anything about feel |
Clickable wireframe | 1-3 days | Can users find things? | Performance, data |
High-fidelity clickable | 1-2 weeks | Does it feel credible? | Technical feasibility |
Coded prototype on device | 3-8 weeks | Does the hardware keep up? | Scale and reliability |
Knowing when to stop
Iteration has diminishing returns. Stop prototyping a stage when three consecutive changes produce no new learning, when the remaining questions can only be answered by production tooling, or when the cost of another round exceeds the cost of being wrong. Document what each prototype proved and what it did not — that record is what keeps the next team from rebuilding a model that already answered its question.
Key takeaways
- Define the question before choosing a prototyping method.
- Ugly prototypes that answer the risk beat pretty ones that do not.
- Reserve budget for the second iteration — the first build is data collection.
Work with LA NPDT: if you are moving from here to execution, start with our rapid prototyping services or talk to us about prototype design.
Frequently asked questions
How much does it cost to make a prototype?
A single 3D-printed form study runs $150-$800. A functional works-like prototype typically costs $3,000-$25,000. A full engineering prototype in production-like materials, with electronics integrated and testing done, generally lands between $15,000 and $80,000 depending on complexity and regulatory exposure.
How long does it take to make a prototype?
A rough form model takes days. A functional prototype takes two to five weeks. An integrated engineering prototype ready for verification testing takes six to twelve weeks, and pilot units built with soft tooling add another six to ten weeks on top of that.
Do I need a patent before making a prototype?
No, but keep dated records and use non-disclosure agreements with vendors. In the United States you have a 12-month grace period after your own public disclosure to file, and most countries have no grace period at all — so file at least a provisional application before you show the prototype publicly or at a trade show.
Should I 3D print or machine my prototype?
Print when you need speed, complex geometry, or several iterations. Machine when the part must be made from the real material and carry real load, hold tight tolerances, or manage heat. Many prototypes use both: printed housings around machined structural or thermal parts.
What is the difference between a looks-like and a works-like prototype?
A looks-like model has the correct geometry, finish and colour but no functioning internals, and exists to test appearance and buyer response. A works-like prototype proves the mechanism or electronics and usually looks nothing like the product. Combining them too early is the most common way to spend twice as much for half the learning.
How to create a prototype when the budget is fixed?
Most first-time inventors have a number in mind before they have a question in mind, which inverts the process. Start from the single riskiest assumption in the product, then buy the cheapest build that can kill it.
If the risk is whether people will hold the device correctly, a printed shell with dead weight inside answers it for a few hundred dollars. If the risk is whether the motor stalls under load, a bench rig with no enclosure answers it — and neither build needs to look like the product.
Filed under:Education
Services related to this guide
- Best prototyping companiesDevelopment firms, instant-quote bureaus and local shops — who fits which job.
- Free prototype cost calculatorFive to eight questions, an instant cost range for a first prototype.
- Prototype development companiesWhich firms take a sketch to a working prototype — and which only fabricate parts.
- Rapid prototypingWorking prototypes in days, from 3D printing to vacuum casting.