
The Ultimate in Gaming Comfort and Control
- Ergonomic Design
- Material Selection and Sustainability
- Prototyping and Testing
- Manufacturing and Fulfillment
- Branding and Packaging


Written by Konstantin Dolgan, Ph.D., NPDP
Founder & CEO, Product Development Engineer
Updated August 30, 2026
Developing a silicone gaming accessory that fits an existing controller is a three-stage prototyping problem: get the fit right, get the feel right, then get the tooling right.
SureFit Pro Grip, developed with Nick Peer, went through all three — FDM prints in flexible plastic, SLA elastic resin parts, then silicone rubber molded from 3D-printed molds, before CNC-machined steel tooling for production.
Project at a glance
- Client
- Nick Peer — SureFit Pro Grip
- Category
- Gaming accessory / ergonomic consumer product
- Material
- Skin-safe, eco-friendly silicone rubber, soft-touch and non-slip
- Prototyping path
- 3D scanning, FDM in flexible TPE, SLA in elastic resin, silicone molded from 3D-printed molds
- Production tooling
- CNC-machined steel molds with polishing and detail finishing
- What we delivered
- Ergonomic design, material selection, full prototyping program and end-to-end manufacturing and fulfillment
The client
Prototype
The challenge

Our solution

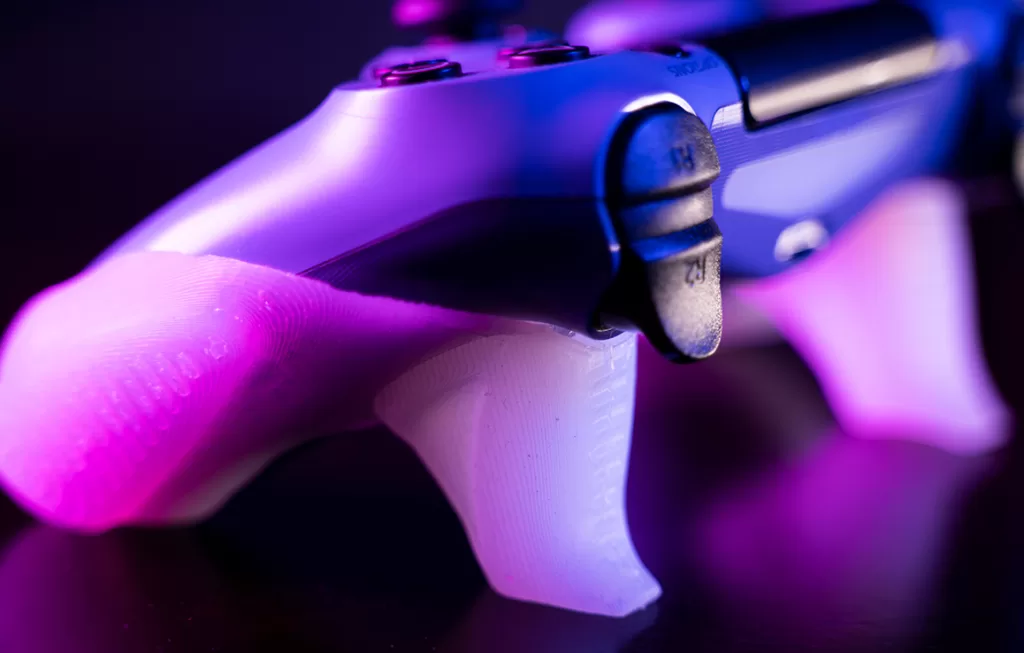
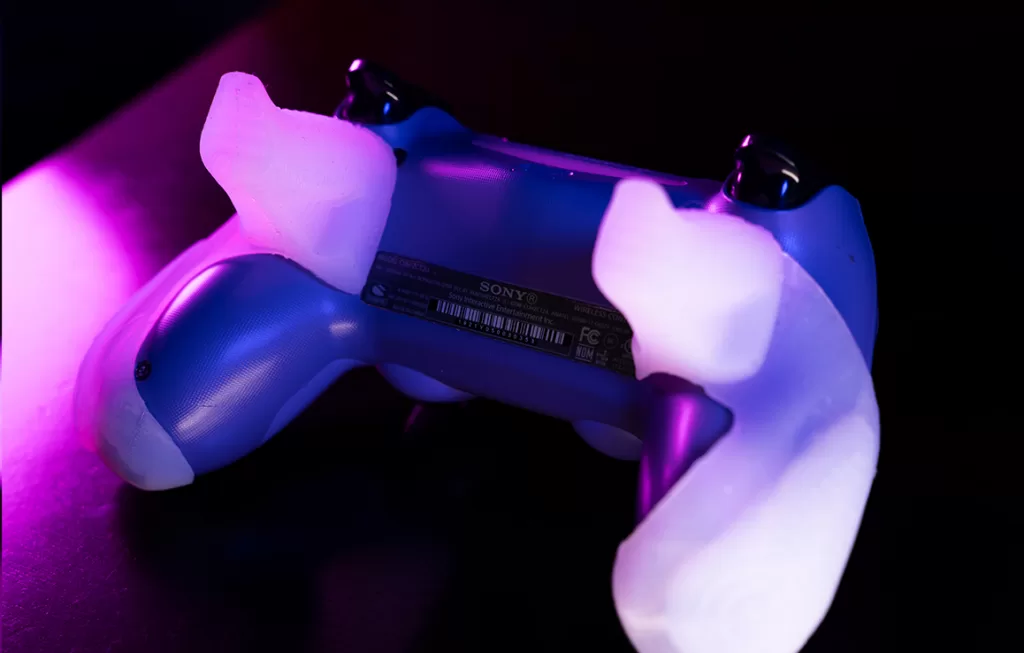
Flexible plastic (TPE) prototype, FDM 3D printed
Elastic resin prototype, SLA 3D printed

Silicone rubber prototype, molded
Tooling and manufacturing
Steel mold CNC machining
The result

Services provided
Ergonomic design
Material selection and sustainability
Manufacturing and fulfillment


Prototyping and testing
Branding and packaging


Manufactured product
Capabilities used on this project
Rapid prototyping services
3D printing, CNC machining, urethane casting and functional prototype builds with published materials, tolerances and lead times.
How a silicone accessory gets prototyped and tooled
Each prototyping method answers one question and only one. Running them in this order is what keeps the steel mold from being cut twice.
1. Capture the controller, do not guess it
3D scanning captured the precise geometry of the gaming controllers. An accessory that wraps existing hardware lives or dies on that data — a millimeter of error shows up as a grip that slips or refuses to seat.
2. FDM first, for fit and alignment
Early prototypes were 3D printed in flexible plastic (TPE) using FDM. They are fast and cheap, and they answer the only question that matters at this stage: does the shape align with the controller?
3. SLA next, for a closer feel
As the design matured we moved to stereolithography with elastic liquid resin, producing high-definition flexible prototypes much nearer to the final product's behavior in the hand.
4. Cast real silicone before cutting steel
Silicone rubber parts were molded using 3D-printed plastic molds. It is labor-intensive, but it is the only way to judge the true tactile feedback and hardness of the production material before committing to tooling.
5. Design for the ergonomic problem, not just the look
The grips exist to address the physical demands of long sessions and strains such as carpal tunnel syndrome. Soft, non-slip, skin-safe silicone was chosen for comfort and security of hold as much as for durability.
6. Machine and finish the production molds
Steel molds were CNC machined, then polished and detail-finished. On a soft-touch consumer part the mold surface is the product surface, so post-processing is a quality decision, not a cosmetic one.
| Method | Material | Question it answers |
|---|---|---|
| FDM 3D printing | Flexible plastic (TPE) | Does it fit and align with the controller? |
| SLA 3D printing | Elastic resin | Does the flex and detail read like the real thing? |
| Molding from printed molds | Silicone rubber | Is the hardness and tactile feedback right? |
| CNC-machined steel tooling | Production silicone | Can we make thousands of these consistently? |
Questions about this project
Straight answers from the engineers who ran the build. Have a different question? Ask us directly.
Talk to an engineerWhy use three different prototyping methods instead of one?
Because each is cheap at answering one question and expensive at answering the others. FDM settles fit in a day; SLA gets you close to the feel; only cast silicone tells you the truth about hardness. Jumping straight to silicone means paying molding labor to learn things a printed part would have told you.
Do I need 3D scanning for an accessory that fits existing hardware?
Yes. Published dimensions and reverse-engineered guesses are not accurate enough for a part that has to stretch over a controller and stay put. Scanning the actual hardware is the cheapest insurance in the whole program.
How are silicone parts actually manufactured at volume?
Through compression or injection molds machined from steel. The tooling is the significant cost, which is why the design is frozen only after cast silicone samples confirm the durometer and surface feel.
Can silicone products be made sustainably?
Material choice is the lever. On SureFit Pro Grip we selected a skin-safe, environmentally responsible silicone, and designed a single-part accessory that extends the life of hardware people already own instead of replacing it.
Industries this project belongs to
See how we approach development in each of these categories, and the other products we have taken from sketch to production there.


