Bridging Digital and Physical Prototyping
Over the past two decades, the relationship between digital and physical prototyping has changed dramatically. A symbolic milestone occurred in 2002 at the Venice Biennale, when Gr
July 18, 202613 min read

Written by Konstantin Dolgan, Ph.D., NPDP
Founder & CEO, Product Development Engineer
Published July 18, 2026Updated September 2, 2026
read 8 mins
Digital and physical prototyping changed a lot over twenty years. Greg Lynn reached a milestone at the 2002 Venice Biennale. He showed the Embryological House, a blue, full-scale model. This work showed how models reveal space and material. These traits do not always show up in digital views. Prototypes became tools that expand design thinking.
Full-scale pavilions are now vital in digital architecture. They let you test build methods and assembly logic. You can also check how structures act and how materials work. These models create a loop. Physical tests help digital models, and digital models guide the build.
People move between devices and physical spaces every day. Users want smooth experiences. New tools often create gaps between digital and physical habits. This tension makes prototyping a must. It acts as a tool to join these different areas.
Digital and physical systems are now converging. This creates tough challenges for prototyping.
- Technology is changing very quickly.
- Users behave in many different ways.
- Software and hardware are now working together.
- People expect experiences to be smooth and easy.
- Mistakes found late cost more and are riskier.
Prototyping helps with these problems. It gives a real form to ideas. Teams can test concepts early. They refine how things work. They also check ideas before making many products.
Prototypes are working versions of design ideas. They are used in many fields. These include architecture, robotics, IoT, healthcare, and engineering. Prototypes help with new ideas. They also help teams work together. You can improve designs in many steps. This lowers risks. It also cuts development costs.
Design Methodologies
Prototyping is key in Agile, Design Thinking, and Double Diamond methods. These frameworks use repeated cycles. In these cycles, prototypes:
- Help bring your ideas to life. This makes them real.
- Check if something is possible. Also, see if people can easily use it.
- Collect comments from users. This helps improve things.
- Make design parts better. You can fine-tune them.
- Find out things you didn't know. This reveals hidden details.
- Support learning by doing. People learn best through action.
Prototypes bridge theory and practice in fields like bioengineering. They help researchers test new methods and check user reactions. You can refine solutions before you start real-world use. This happens before any clinical work begins.
Prototyping as Simulation and Risk Reduction
Prototyping functions as a form of simulation within product development. It helps teams:
- Assess how well it works and its speed.
- Cut down on the time it takes to develop.
- Use fewer resources.
- Know the problem area and the suggested fix.
- Check systems before they are fully released.
A major benefit is lower risk. It is safer to find a flaw in a model aircraft. It costs much less than finding one after manufacturing. This rule applies to both engineering risks and human safety.
Types of Prototypes: Low‑Fidelity and High‑Fidelity
- These are low-fidelity prototypes.
- It is simple and cheap.
- It is made from paper, cardboard, or foam.
- These are used for early exploration.
- They help find conceptual flaws.
- Detailed working models.
- They closely look like the final product.
- They show how it looks, works, and feels to use.
- They are used for detailed tests. Stakeholders also evaluate them.
- They offer good ideas about comfort and ease of use.
Figure 1. Low‑Fidelity Prototypes v s High‑Fidelity Prototypes (source – www.protopie.io/blog )
Figure 1. Low‑Fidelity Prototypes vsHigh‑Fidelity Prototypes (source –Protopie: low fidelity vs high fidelity prototyping)
Both types support learning through repetition. High-fidelity prototypes offer more realism. They also lead to more accurate decisions.
Digital Design Practice
In digital design, prototypes play a hybrid role:
- External communication Large‑scale installations and pavilions demonstrate new digital methods to broader audiences. Internal validation Prototypes test digital models, fabrication strategies, and material behaviors.
Digital design uses simulation, build tech, and new materials. Physical prototypes make sure designs work. They also improve digital workflows. This process is a cycle, not a line. Physical tests help digital models. Models grow from what we learn from physical things.
Virtual Prototyping: Capabilities and Strengths
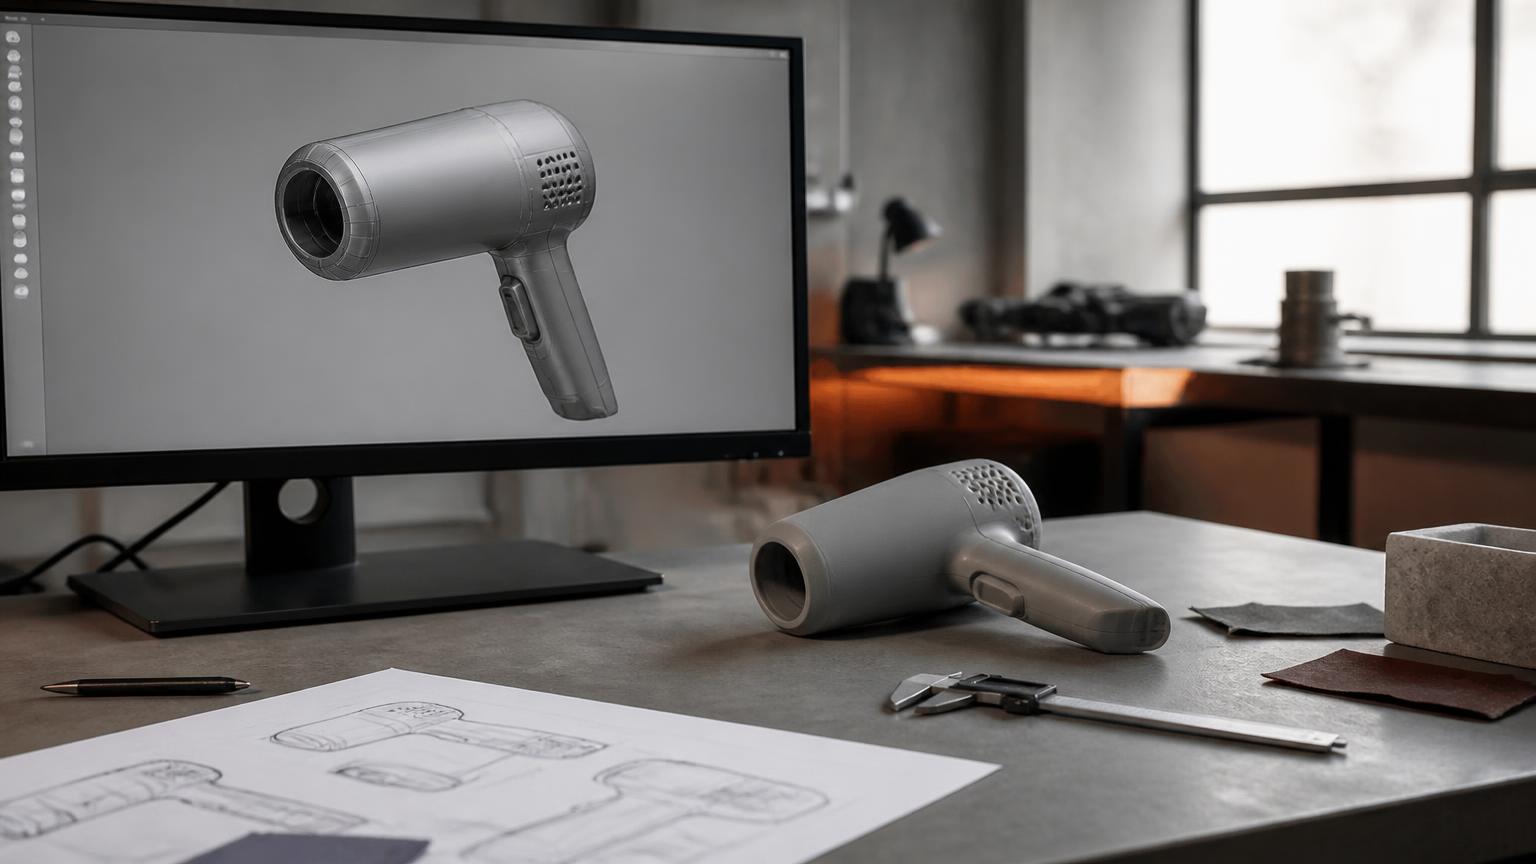
New CAD, VR, and simulation tools made virtual prototyping vital for product development. Virtual means making a digital version of a product. This lets teams see, test, and judge a design before they build it.
Early virtual prototypes only showed how things looked. Now, modern tools test structure, heat, and making. Developers can check how a product works in a computer. They do this before they start to build it.
Also, product development is iterative. Designs are tested, checked, and fixed many times. Finding errors late used to mean building new physical parts. This led to high costs and slow work. Virtual tools fix this by finding flaws early. Changes then cost much less and are easier to make. Teams can cut work cycles and improve quality. They also get products to market faster.
Virtual prototyping use has grown in automotive, healthcare, and electronics fields. Cloud platforms let engineers run FEA and CFD tests easily. Teams work together on digital models without building physical versions. These tools help teams share and edit design steps fast. They work well for teams in different places.
Virtual prototyping is very flexible. This is a big advantage. Designers can quickly change materials, colors, and shapes. You can compare many design options fast. Digital models are easy to copy and save. These files help teams work together on engineering tasks.
Virtual prototyping has limits. Digital models are only as good as the math used to create them. Real-world issues, like material flaws and friction, are hard to model. Wear, deformation, and touch feedback also create challenges. Complex software needs experienced users. This makes it harder for teams to learn. High-quality tests need a lot of computing power. They also need careful data management.
Good virtual prototypes let users test how a product looks and feels. Size, weight, and material look impact how users view a product. Usability tests check if users can easily finish tasks. For a cleaning robot, this means setting schedules and docking it. Users must also empty debris and care for the system. Testing these things early helps improve design choices before production begins.
Virtual methods save money and shorten design cycles. They allow for fast changes and early testing. These benefits help in markets with fast-changing needs. Such industries often have short product life cycles. Still, virtual tools work best with physical prototypes. Each method fixes the flaws found in the other.
Despite its strengths, virtual prototyping has limitations:
- Simulations rely on mathematical models and their assumptions. These can affect accuracy.
- It is hard to model things like friction and wear. Deformation, touch, and environmental effects are also difficult. This makes simulations less accurate.
- This work needs special knowledge. It also requires powerful computers.
- Physical interaction is missing. Things like weight, texture, balance, and comfort are not felt.
- You cannot fully check safety-critical tasks. Simulations cannot guarantee these important functions.
Virtual prototyping is great for exploring ideas. But it cannot replace physical validation. Physical tests are needed for real-world behavior.
Physical Prototyping: Tangibility and Real‑world Testing
Physical prototyping makes a real object. Users can test this object. Users can hold and check these models directly. Virtual prototypes are only digital files. But physical models give you a real 3D object. This object looks much like the final product design.
Physical models stay vital for electronics, cars, and aerospace teams. They are also used for medical tools and mobile tech. Digital tools have improved, but some tests need real contact. Users can hold and use a physical model naturally. This creates a real feel that computers cannot fully match.
Tangibility is a key benefit of physical models. Teams check size, weight, balance, and texture directly. They also test material quality and structural stiffness. These traits affect comfort and how a user feels. Virtual tools cannot judge these factors well. Physical tests show issues with grip and control placement. They show assembly and care problems that digital tests miss.
Physical prototypes help check engineering work. This work is often done on virtual models. Testing lets designers check strength, how things work, and safety in real life. Engineers often find problems with putting things together or materials. They find these issues during builds. Computer models might not show these real tasks. Physical models show flaws before making many products.
Physical models have some downsides. They need materials, tools, labor, and time to build. This makes each change cost more than digital edits. Costs and complexity grow as the model becomes more realistic. These models offer low flexibility once built. Changes often mean you must rebuild or rework the part. Tracking versions is also harder than with digital files.
Modern product development mixes physical and virtual tools. Virtual models allow for fast testing and early simulation. Physical prototypes provide proof through real-world testing. This plan helps teams cut costs while staying confident. It makes sure products work well before full production starts.
Product improvement starts with its design. The conceptual design then becomes a physical prototype. Improving this physical prototype is key.
It helps develop new products or new versions of old ones. We usually make prototypes to check and test the design. We do this through system analysis.
Making these prototypes has become easier lately. This is thanks to new rapid prototyping methods. These methods save both time and money.
They let us make many good physical prototypes faster. This draws in more clients. It does so with better looks and quicker finishes.
A physical prototype can be a simple model or a full version. It shows how a design works under real conditions. Types include operating, visual, functional, and user-testing models. They help you find costs, solve problems, and test designs. They also help with marketing and patent applications. Each type adds value to the prototyping process.
Americans are often tough on consumer products. In Europe, dropping a phone under a taxi is your fault. You buy a new one yourself. In the United States, you take the broken phone back. You demand a new one from the dealer. U.S. products must be tough and reliable. They must have high quality and low prices.
Designers carry the heavy load of meeting these conflicting needs. You must meet tough design specs while staying on budget. You must also follow shorter development schedules. Many tools now help designers finish these tasks. Computer-aided design (CAD) and computer-aided manufacturing (CAM) speed up design and tooling. Rapid prototyping tools like FDM, SLA, and SLS give early proof-of-concept models.
Software like IGES and STEP lets teams share 3D CAD/CAM data. Laser scanning and CMMs help with reverse engineering. Fast-turn soft tooling methods can produce near-production parts. These include RTV molds, high-speed milling, and centrifugal casting. Tools like Algor, ANSYS, and MSC Nastran solve complex system problems. They handle static, dynamic, thermal, shock, and vibration loading.
Designers have many tools, but not all fit every case. Your main goal is to meet system requirements. A successful project must also meet budget and time limits. You must balance these three goals to choose the right tools.
Physical has drawbacks:
- It costs more and takes longer to build.
- It has limited flexibility. Changes mean rebuilding.
- There are challenges with documentation and version control.
- Outsourcing may lead to potential schedule risks.
Higher fidelity means more cost. It also means more complexity. Still, physical prototypes are key for final checks.
Choose virtual or physical prototypes for each case. Complexity, scale, and the environment are key factors. Project schedules, budgets, and team skills also matter. Risk, liability, and resources help you find the best path.
Testing and simple analysis work well for basic systems. These systems have low risks and are easy to build. For complex systems with high risks, use numerical analysis. This method is better when physical models are hard to create.
Making the right choice early helps you find design flaws fast. This saves money and ensures a smooth move to manufacturing. It also helps you release the final product on time. This process creates a product that meets all needs and stays on budget.
Numerical vs. Analytical Approaches
- Numerical Analysis (Virtual)
Advantages:
- It handles complex shapes and structures.
- It solves problems that are not linear. It also handles dynamic problems.
- It gives you very detailed results.
- It helps with precise fine-tuning.
Disadvantages:
- The tools can be expensive.
- There is a steep learning curve.
- Theoretical results need physical validation.
- Geometries might need to be simplified.
- We create prototypes. This includes both analytical and physical models.
Advantages:
- It is quick.
- You will get real-world information.
- It does not cost much.
- The prototypes show the product very well.
Disadvantages:
- Production might be done by others. It can be outsourced.
- You must include safety factors.
- It may need to be made simpler.
Choosing the Right Approach
Depends on:
- The system can be very complex.
- Consider the liability and safety requirements. These are important for the project.
- What is the budget? What is the schedule?
- We need to know what expertise is available.
- Can we physically build a prototype? This is about feasibility.
Simple systems are less risky. They can use physical models. Complex systems have higher risks. They need computer analysis.
Integrating Digital and Physical Prototyping
Modern development combines both approaches:
- Virtual prototypes help you explore ideas quickly. They aid in optimization. You can find errors early.
- Physical prototypes confirm real-world performance. You can touch and evaluate them. They are good for safety testing.
They work together. This lowers costs. It also speeds up development. They make sure of product performance. They also check usability and how easy it is to make. Lastly, they ensure customers will like it.
Contact us today to learn how LA NPDT can assist in realizing your project.
Contact us today to learn how LA NPDT can assist in realizing your project.
Conclusion
Digital and physical prototypes work together. They do not compete. Virtual models speed up testing and lower early costs. Physical parts prove real-world use and user experience. This mix creates a strong plan. It boosts quality and lowers risk in every industry.
Subscribe
Dive deep into the dynamic world of new product development with LA NPDT Insights Blog.
Recent Posts
Geopolitical Risk in New Product Development
Component Lifecycle Management: Designing for Obsolescence
Material Qualification Strategy: Reducing Risk Before Production
Bridging Digital and Physical Prototyping
Systems Thinking in Hardware Development
You used Chatgpt to develop a product idea. Now what?
Subscribe
Dive deep into the dynamic world of new product development with LA NPDT Insights Blog.
Recent Posts
Geopolitical Risk in New Product Development
Component Lifecycle Management: Designing for Obsolescence
Material Qualification Strategy: Reducing Risk Before Production
Bridging Digital and Physical Prototyping
Systems Thinking in Hardware Development
You used Chatgpt to develop a product idea. Now what?
Low-Fidelity vs. High-Fidelity Prototypes
Feature | Low-Fidelity Prototypes | High-Fidelity Prototypes |
|---|---|---|
Cost | Simple and inexpensive | Closely resemble final product |
Purpose | Used for early exploration | Used for detailed testing and stakeholder evaluation |
Materials | Made from paper, cardboard, foam | Simulate appearance, functionality, and user experience |
Benefit | Help identify conceptual flaws | Provide reliable insight into ergonomics and usability |
Sources and standards
- ISO/ASTM 52900 defines additive manufacturing terms. It sets standard definitions for these processes.
- NIST researches additive manufacturing. This work supports 3D printing quality for processes and materials.
- USPTO offers patent basics. This is official guidance for filing provisional and non-provisional patents for new products.
What each method actually reveals
Digital models are fast and free to change. Physical parts are slow, costly, and very honest. Teams fail when they use one to replace the other. Each tool solves different problems. The best project uses the right tool for each specific question.
Question | Best method | Cost | Turnaround |
|---|---|---|---|
Does it fit together dimensionally? | CAD assembly and interference check | Included in design time | Hours |
Will the rib crack under load? | FEA, then a printed part to confirm | $0-$3,000 | 1-5 days |
Does it feel right in the hand? | Physical, always | $150-$900 | 2-5 days |
Will it overheat in the enclosure? | Thermal simulation, then instrumented physical | $2,000-$8,000 | 1-3 weeks |
Will users understand the interface? | Clickable digital prototype with real users | $1,000-$6,000 | 1-2 weeks |
Will it survive drop and shipping? | Physical only | $2,000-$12,000 | 2-4 weeks |
Will it mould without sink and warp? | Mould-flow simulation, confirmed on T1 parts | $1,500-$5,000 | 1-2 weeks |
Is the seal actually IP67? | Physical, tested to standard | $1,500-$6,000 | 2-3 weeks |
Caption: indicative US ranges for a mid-complexity consumer or industrial device.
Where digital prototyping quietly misleads
- Simulated material properties come from perfect specimens. Your part has weld lines, fiber orientation, and residual stress. Handled parts are never ideal.
- Screen renders make products seem smaller and lighter. They are not like the real thing. Every team is surprised by the first physical print.
- Tolerance stacks pass in CAD at average settings. They often fail in the real assembly at the extremes. CAD models are not always realistic.
- Simulated drop tests rely on contact and damping assumptions. These are just educated guesses. They are not proven until a real drop occurs.
- Digital user interface prototypes hide many issues. These include latency, glare, glove use, and one-handed operation. Real-world conditions are often different.
- Assembly simulations never show real-world problems. For example, a technician's hand might not fit past a harness. This often happens in practice.
A sequence that works
- Weeks 1-2: We will work on CAD concepts. We will also create low-fidelity foam or printed models. This locks in the size and grip.
- Weeks 2-4: We will run simulations. These cover load, thermal, and flow issues. This will help us change the design.
- Weeks 4-6: We will build functional printed prototypes. These will use real electronics. We will check fit, thermal performance, and usability.
- Weeks 6-10: We will make appearance models. We will also prepare instrumented durability samples. Test these against certification standards.
- Week 10 and beyond: We will use soft tooling or bridge parts. These will be made from the final production material. This happens before we commit to hard tooling.
- Throughout the process: Log the purpose and results of every prototype. This prevents re-printing parts for already answered questions.
We use this cycle in rapid prototyping. Our product engineering team handles the design steps. We do not aim to build fewer parts. You must build each one to answer a specific written question.
Frequently asked questions
What is digital prototyping?
We check designs using CAD models. We also use simulation and software prototypes. This happens before any physical part is made. We check fit, stress, and heat. We also look at mold filling and user interface flow.
Can digital prototyping replace physical prototypes?
No, it does not. It cuts down on early physical tries. But you need a physical part for some things. This includes ergonomics and how real materials act. You also need it for sealing, surviving drops, and assembly access.
How much does a physical prototype cost?
A printed look or fit model usually costs $150-$900. A working prototype with real electronics costs $2,000-$15,000. Soft-tooled parts made with production material start around $6,000 for each part family.
When should you stop prototyping and commit to tooling?
Move to production when only tooling questions remain. These include cycle time and process limits. You must first answer all questions on fit and function. Test thermal needs, seals, and use on parts made of production material.
Filed under:EducationUncategorized
Tagged:2025
Services related to this guide
- Best prototyping companiesDevelopment firms, instant-quote bureaus and local shops — who fits which job.
- Free prototype cost calculatorFive to eight questions, an instant cost range for a first prototype.
- Prototype development companiesWhich firms take a sketch to a working prototype — and which only fabricate parts.
- Rapid prototypingWorking prototypes in days, from 3D printing to vacuum casting.