Service Blueprint vs Journey Map: Which to Use in Product Development
Service blueprint vs journey map: what each one reveals, when storyboards or experience flows fit better, and how to build one that changes engineering decisions.
February 22, 20268 min read

Written by Konstantin Dolgan, Ph.D., NPDP
Founder & CEO, Product Development Engineer
Published February 22, 2026Updated September 2, 2026
Journey mapping is the practice of laying out every step a person takes with a product or service — their actions, touchpoints, emotions and unmet needs — on a single timeline the whole team can read. In new product development it exists for one reason: to force the assumptions buried inside a spec into the open before engineering time is spent defending them.
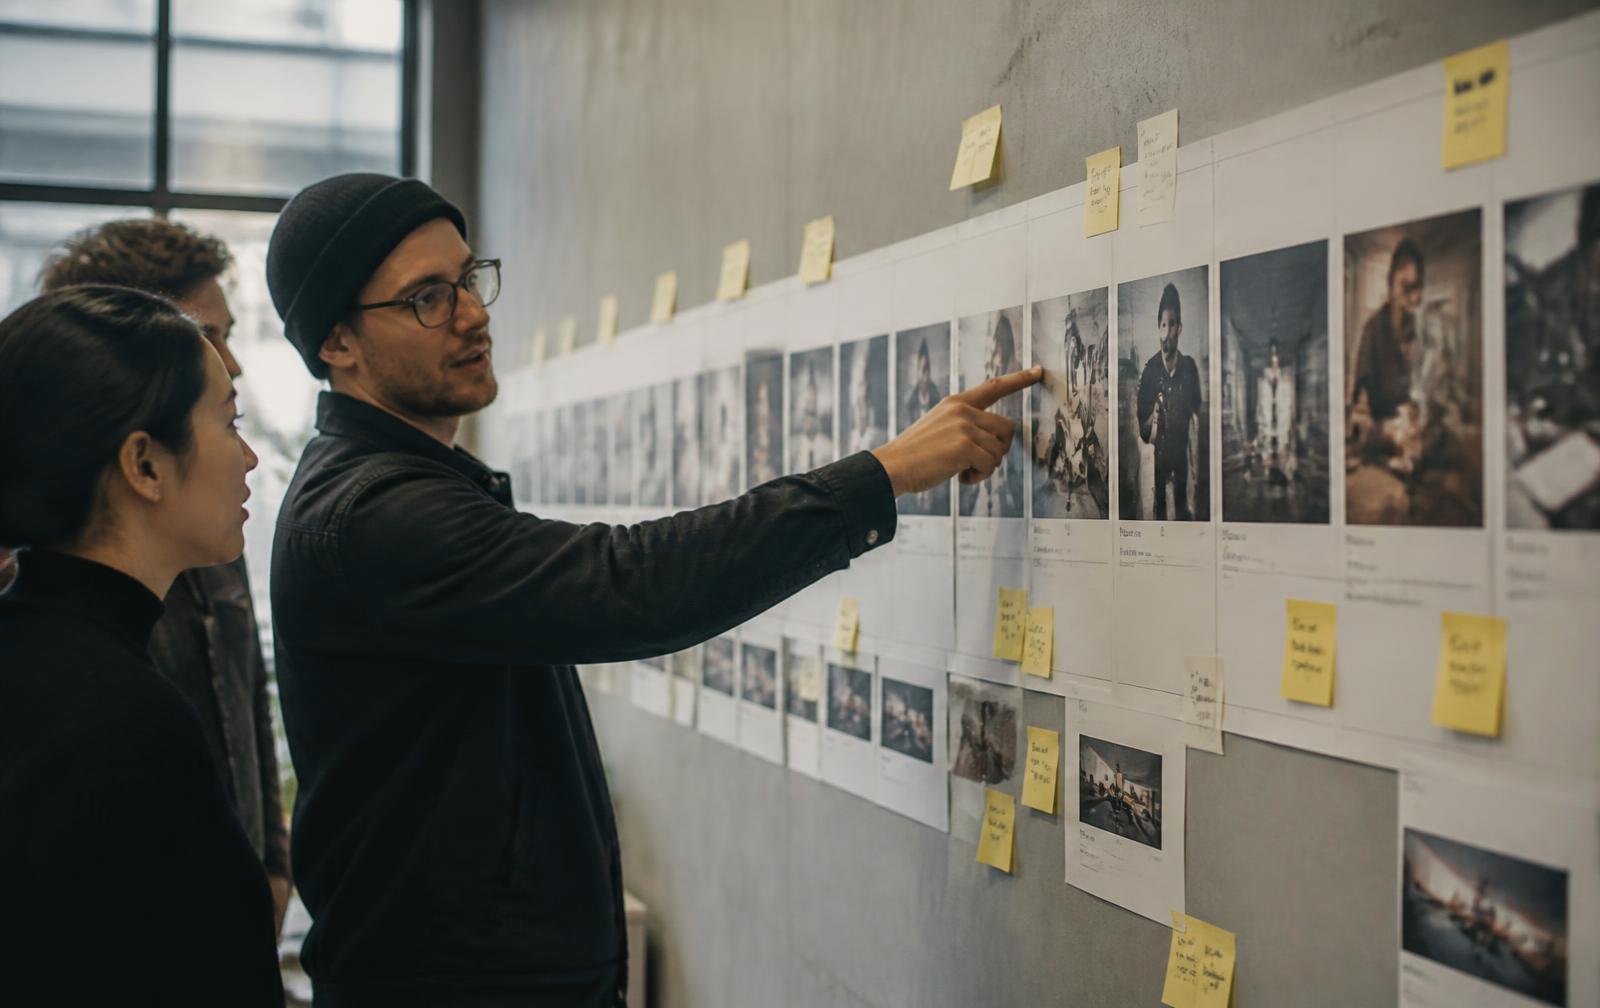
Teams often use journey map, storyboard and experience flow interchangeably. They are not the same artifact, they answer different questions, and picking the wrong one is why so many maps end up as wall art. This guide covers what each one does, how to build a journey map that survives contact with an engineering review, and how we use them inside product discovery.
What is journey mapping?
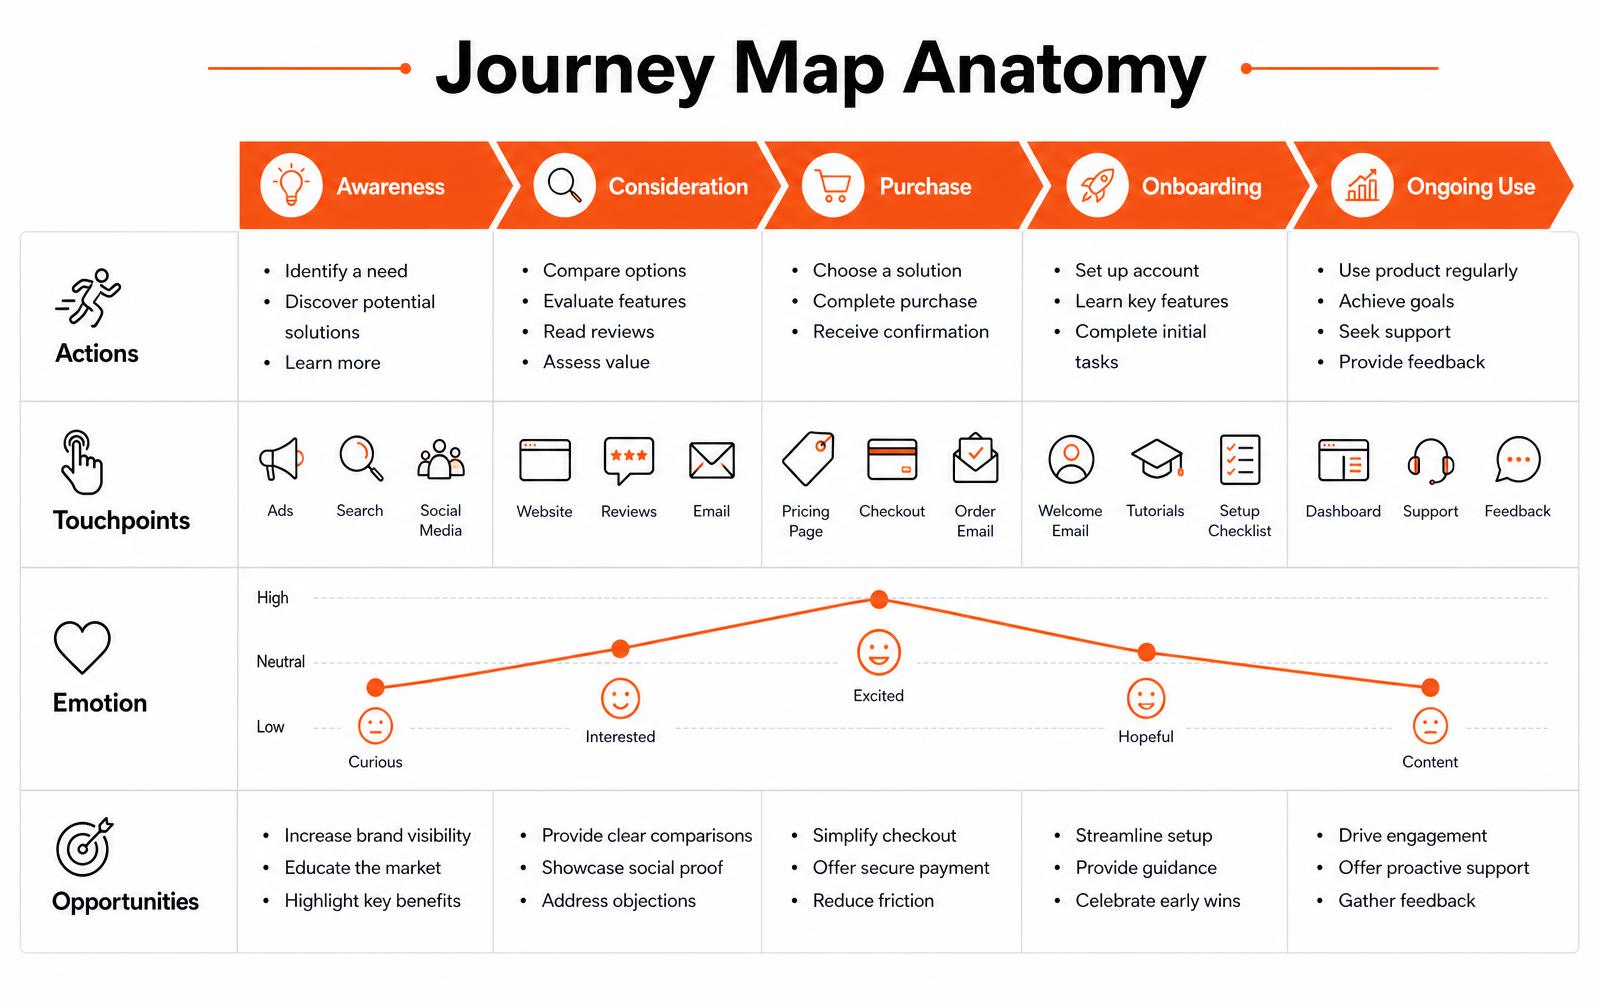
Journey mapping documents an end-to-end experience from the user's point of view rather than the company's. A finished map is a grid. Columns are stages in time — for a hardware product that is usually awareness, purchase, unboxing, setup, routine use, maintenance and eventual replacement. Rows are the evidence you collected against each stage.
- Actions — what the person physically does, in their words, not yours.
- Touchpoints — the product, packaging, app, manual, retailer, support line or technician they encounter.
- Thoughts and emotion — the sentiment curve that shows where confidence rises and where it collapses.
- Pain points — friction observed in research, quoted rather than paraphrased.
- Opportunities — the design or engineering response, each one owned by a named person.
The last row is what separates a useful map from decoration. A map without owned opportunities is a research summary; a map with them is a backlog.
Journey map vs storyboard vs experience flow
All three are visual communication tools, but they operate at different zoom levels. Choose by the question you are trying to settle.
Tool | Zoom level | Answers | Best used when |
|---|---|---|---|
Journey map | Weeks to years | Where does the overall experience break down, and who owns fixing it? | Framing a program, prioritizing features, aligning marketing, design and engineering |
Storyboard | Minutes to hours | What does one specific moment actually look and feel like? | Pitching a concept, testing a use scenario, briefing industrial design or a video shoot |
Experience flow | Seconds to minutes | What is every state, branch and error the user can hit? | Specifying firmware, app screens, setup sequences and failure handling |
A common sequence in a hardware program: journey map first to find the two moments that matter, a storyboard for each of those moments to make them concrete, then an experience flow for the one moment that turns into software or firmware requirements.
How to build a journey map in five steps
- Define the actor and the scope. One persona, one goal, one boundary — "a first-time buyer from purchase through first successful use." Maps that try to cover every user and every stage cover nothing.
- Collect real evidence. Five to eight contextual interviews or observed sessions per segment surfaces the majority of severe problems. Watch people use the current product or the workaround they use instead of one.
- Lay out the stages. Use the language your users use. If they say "getting it working" and you say "onboarding," the map already drifted from reality.
- Fill rows with quotes and artifacts, not opinions. Every cell should be traceable to a session, a support ticket, a warranty claim or an analytics event.
- Convert the low points into owned opportunities with a decision date. Anything without an owner gets deleted from the map at the review.
What journey mapping costs and how long it takes
Effort level | Typical duration | Typical cost | What you get |
|---|---|---|---|
Assumption map (workshop only) | Half a day | Internal time | A shared hypothesis and a list of what you do not know |
Lightweight research-backed map | 2 to 3 weeks | $8,000 to $20,000 | 6 to 10 interviews, one persona, one validated map with opportunities |
Multi-segment program map | 4 to 8 weeks | $25,000 to $60,000 | Multiple personas, field observation, service blueprint layer, prioritized roadmap input |
The assumption map is not a waste of money — it is the cheapest way to find out that your team disagrees about who the customer is. It only becomes a liability when nobody goes and checks it.
Not sure which map your team actually needs?
We run journey mapping and concept research as part of product discovery, then carry the findings straight into engineering.
Storyboards: making one moment concrete
A storyboard is a short sequence of frames showing a single scenario: the moment a technician opens the enclosure in the rain, the moment a parent tries to fit the device one-handed. Six to ten frames is plenty. Each frame carries a caption describing the action and the constraint that makes it hard.
Storyboards earn their keep in reviews because they are impossible to argue with abstractly. A stakeholder can dispute a bullet in a requirements document; it is much harder to dispute a drawing of a person holding a part they cannot reach. In industrial design work we storyboard before CAD whenever a use scenario is contested.
Experience flows: every state and every branch
An experience flow is closer to a state diagram than a narrative. It maps entry points, decisions, system responses, error states and recovery paths. For connected hardware, the flow is where you discover that pairing fails when the phone is on cellular, or that the device has no defined behavior when the battery dies mid-firmware-update.
- Draw the happy path first, then add every failure branch — the failures are where the engineering work hides.
- Mark which system owns each step: device, app, cloud, retailer or human support.
- Attach acceptance criteria to each branch so QA can test the flow rather than the feature.
Common journey mapping mistakes
Mistake | Why it happens | Fix |
|---|---|---|
Mapping the internal process | Teams document what the company does, not what the user experiences | Every row is written from the user's seat, in the user's vocabulary |
No research behind the cells | The workshop is faster than fieldwork | Mark unresearched cells in a different color and treat them as open risks |
Map ends at purchase | Marketing owns the exercise | Extend through setup, maintenance and end of life — that is where hardware loyalty is won or lost |
No owner on any opportunity | The map is treated as a deliverable, not an input | Assign a name and a date to every opportunity before the session ends |
Never updated | It was built as a one-off artifact | Revisit after each round of user testing; a map older than two quarters is a historical document |
Making maps feed the engineering plan
The handoff is the point of the whole exercise. Each prioritized opportunity should leave the review as one of three things: a requirement in the specification, an experiment in the next round of prototyping, or an explicit decision to accept the risk. If an opportunity cannot be classified into one of those three, it was never a finding — it was a comment.
On the programs we run, this is how a journey map turns into hardware: the emotional low point at "first setup" becomes a testable hypothesis, the hypothesis becomes a prototype built only to answer it, and the prototype result becomes a locked requirement before tooling money is committed.
Frequently asked questions
What is journey mapping in product development?
Journey mapping is the practice of documenting each stage of a user's experience with a product — their actions, touchpoints, emotions and unmet needs — on a single timeline. In new product development it is used to identify where the experience breaks down and to turn those breakdowns into prioritized design and engineering requirements before money is committed to tooling.
What is the difference between a journey map and a storyboard?
A journey map covers the whole experience over weeks or years and shows where it breaks down across many touchpoints. A storyboard zooms into one specific moment, usually six to ten frames, and shows what that moment looks and feels like. Use a journey map to prioritize, a storyboard to make a single scenario concrete for the team.
How long does journey mapping take?
A workshop-only assumption map takes half a day. A research-backed map with six to ten user interviews typically takes two to three weeks. A multi-segment program map with field observation and a service blueprint layer runs four to eight weeks.
How many users do I need to interview for a journey map?
Five to eight participants per distinct segment surfaces the large majority of severe usability problems. Adding participants within the same segment produces diminishing returns faster than adding a new segment does, so spend extra budget on covering another user type rather than on more interviews of the same one.
Who should be in the room during a journey mapping session?
At minimum design, engineering and whoever owns the customer relationship — support or sales. Engineering presence matters most: the point of the map is to change what gets built, and findings that engineers never heard first-hand rarely survive the specification review.
Is journey mapping useful for physical products, not just software?
Yes, and arguably more so. Physical products have unboxing, assembly, maintenance, consumables, repair and disposal stages that software does not, and those post-purchase stages drive returns, reviews and warranty cost. A map that stops at checkout misses where most hardware money is lost.
Turning research into a product?
Our discovery team runs the mapping, then the same engineers who sat in the sessions build the prototype.
Service blueprint vs journey map: which artifact answers which question
Teams often use the two terms interchangeably and then wonder why a workshop produced a wall of sticky notes and no decisions. A journey map is customer-facing: it traces what a person experiences over time, what they are trying to accomplish at each step, and where the experience breaks down.
A service blueprint is organization-facing: it takes the same timeline and adds the layers underneath it — frontstage actions the customer sees, backstage actions they never see, and the supporting systems, suppliers, and firmware that make each step possible.
In hardware development the distinction matters because most failures live in the backstage layer. The unboxing is delightful, the pairing flow is clean, and then a warranty claim takes eleven days because nobody mapped the reverse logistics path.
Question you are trying to answer | Use a journey map | Use a service blueprint |
|---|---|---|
Where does the customer get frustrated? | Yes — emotion curve per step | Only indirectly |
Which internal handoff causes the delay? | No | Yes — backstage swimlane |
What should the packaging communicate? | Yes — first-run moments | Partly |
Which system or supplier owns a failure? | No | Yes — support layer |
What do we build first? | Yes — pain intensity ranking | Yes — dependency ordering |
What do we measure after launch? | Yes — per-step success metric | Yes — internal cycle times |
The practical rule: build the journey map first, because it establishes the timeline and the vocabulary everyone will use. Then extend the two or three worst steps into a blueprint. Blueprinting the whole journey at once is expensive and most of it will be uncontroversial. Blueprinting the return path, the first-time setup, and the consumable reorder flow usually surfaces every unowned dependency in the program.
Turning storyboards into engineering requirements
Storyboards earn their place when each frame is convertible into something testable. A frame showing a user opening a case one-handed while holding a child becomes a grip force target, a lid detent specification, and a usability test protocol.
A frame showing the device on a workbench in low light becomes an indicator luminance requirement. If a frame cannot be converted into a requirement, a test, or a deliberate decision to do nothing, it is decoration — cut it before the review so the artifact stays trustworthy.
Keep frames coarse. Eight to twelve frames covering the full arc beats forty frames covering one afternoon of use. Draw them badly on purpose: polished renderings invite feedback about styling, sketches invite feedback about behavior, and behavior is what you are trying to learn at this stage.
Running the session so it produces decisions
- Name the timeline before the workshop — a shared start and end point prevents an hour of scope argument.
- Bring evidence: support tickets, warranty data, three recorded user sessions. Opinions lose to recordings.
- Assign an owner to every pain point in the room, not after. Unowned pains do not get fixed.
- Mark each step with the internal team that touches it; steps with more than two owners are your integration risk.
- Convert the top three pains into requirements with numbers and acceptance criteria before anyone leaves.
- Photograph the wall, then rebuild it digitally the same week — physical artifacts decay and the rebuild forces editing.
One more discipline that separates useful maps from wall art: revisit them at each gate. The map made during concept work is a hypothesis. After the first usability round, the emotion curve changes shape, some steps disappear, and new ones appear that nobody imagined. A map that has not been edited since the kickoff is telling you the team stopped learning, not that the map was right.
Key takeaways
- Journey maps explain the customer experience; service blueprints expose the internal machinery behind it.
- Blueprint only the worst two or three steps — full-journey blueprints burn budget on uncontested territory.
- Every storyboard frame should convert into a requirement, a test, or an explicit decision.
- Assign an owner to each pain point during the session, and re-edit the map at every development gate.
Work with LA NPDT: if you are moving from here to execution, start with our our product development process or talk to us about end-to-end product development.
Filed under:EducationUncategorized
Tagged:2025
Services related to this guide
- Product design servicesIndustrial design and CAD taken all the way to manufacturable files.
- Rapid prototypingWorking prototypes in days, from 3D printing to vacuum casting.
- Electronic design servicesSchematic, PCB layout, firmware and bring-up, through to production handoff.
- Product development examplesReal projects we designed, prototyped and shipped.