Compression Molding vs Injection Molding: Which to Use, and When
The two processes differ most in what they cost you before the first good part. Here is how to choose, illustrated by a silicone product that went to market on compression molds.
August 22, 20269 min read

Written by Konstantin Dolgan, Ph.D., NPDP
Founder & CEO, Product Development Engineer
Published August 22, 2026
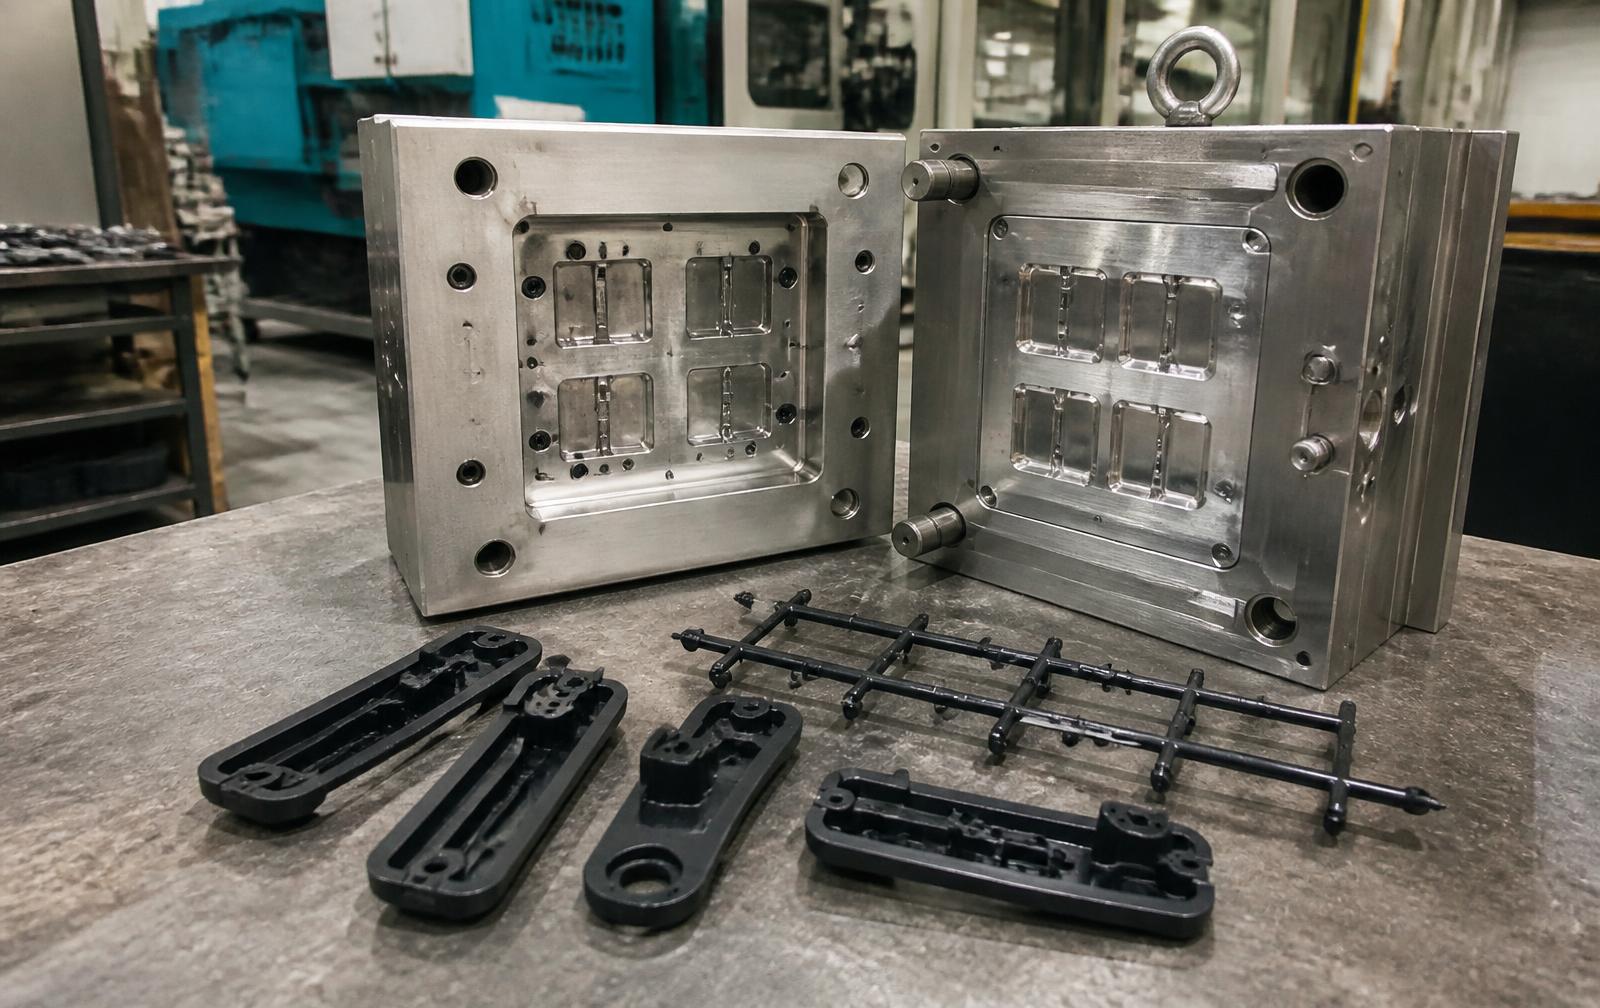
Compression molding presses a pre-measured charge of material between two heated mold halves that close on it, so the tooling is simple and cheap but each cycle is slow and needs an operator. Injection molding forces molten material into a closed tool under pressure, so the tooling costs far more and takes longer to build, but parts come out fast, identical and cheap. In practice the choice is decided by volume: compression wins at low and moderate quantities, injection wins once the tool cost divides into enough parts.
The comparison in one table
Compression molding | Injection molding | |
|---|---|---|
Tooling cost | Low - simple two-part molds | High - complex tool with runners, gates, ejection and cooling |
Tooling lead time | Weeks | Typically several times longer |
Cost per part | Higher - slow cycles, more manual labour | Low once running |
Sensible volumes | Prototypes to moderate production | Moderate to very high production |
Materials | Excellent for silicone, rubber and thermosets | Excellent for thermoplastics; liquid silicone needs specialised LSR tooling |
Geometry | Best for simpler shapes, thicker walls, gentle undercuts in flexible materials | Handles complex geometry, thin walls, ribs and bosses |
Tolerances and repeatability | Looser; more flash and trimming | Tight and highly repeatable |
Cosmetics | Parting lines and flash usually need trimming | Clean surfaces straight from the tool |
Changing the design later | Cheap - the tool is simple to modify or replace | Expensive - tool changes are a real project |
The decision rule
- Rubber, silicone or another thermoset, and you are not yet at high volume: compression molding, almost always.
- Thermoplastic part at meaningful volume: injection molding, and design for it from the start.
- Design still likely to change: compression, so a revision costs a modest tool change rather than a new steel tool.
- Unproven demand and limited capital: compression to launch, then move to injection when the volume justifies the tool.
- Thin walls, tight tolerances, fine detail or cosmetic A-surfaces: injection, whatever the volume.
A worked example: the Flip Flap silicone product
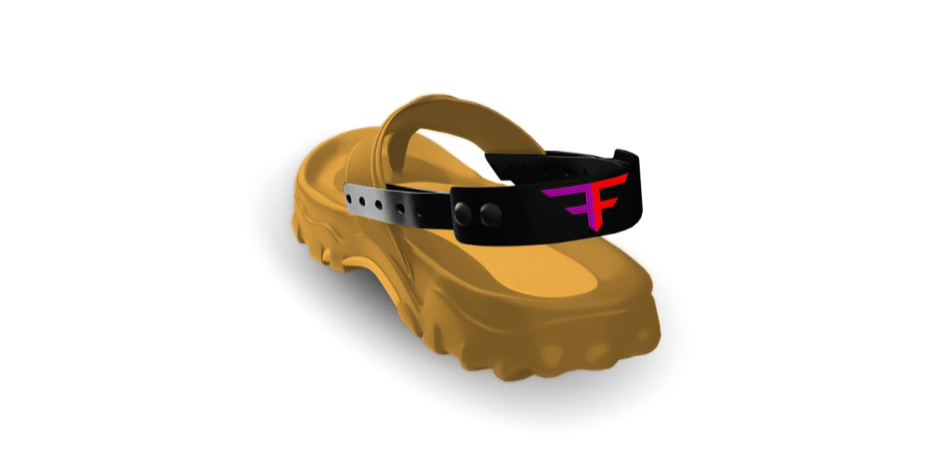
The client came to us with a silicone rubber prototype and a working concept, and needed to get it made in small batches without a large upfront commitment. That is the exact situation this comparison is written for.
Two problems had to be solved. The first was the material. Silicone rubber is not a single thing - hardness, elasticity and softness are set by the formulation, and the prototype material did not have the right balance for the product's feel and function. We custom-blended different types of silicone rubber and tested combinations until the ratio between elasticity and softness matched what the product actually needed.
The second was the process. We prepared the design for manufacturing and specified compression molding for production. Because the molds are simple, the client could get to a sellable product and start selling with a low investment, rather than paying for injection tooling before knowing whether the market wanted it.

What compression molding costs you
Cheap tooling is not free performance. Compression cycles are slower, so labour is a bigger share of the unit cost, and that share does not fall much with volume. Flash along the parting line usually needs trimming, which is another manual operation.
Tolerances are looser than injection, so features that must fit precisely need to be designed with more margin. And there is a crossover point where the accumulated per-part premium exceeds the injection tool you avoided - which is precisely when to switch.
Where the break-even actually sits
The choice is an arithmetic one once you know two numbers: the difference in tooling cost and the difference in unit cost. Injection tooling costs more up front and produces cheaper parts faster; compression tooling is cheap and slow. Divide the tooling gap by the per-part saving and you have the volume at which switching pays for itself.
Compression molding | Injection molding (LSR) | |
|---|---|---|
Tooling | $3k - $12k | $20k - $60k |
Tooling lead time | 3 - 5 weeks | 8 - 14 weeks |
Cycle time | Minutes per shot | Seconds per shot |
Indicative unit cost at 1,000 pcs | Higher - labour dominated | Not yet worth the tool |
Indicative unit cost at 50,000 pcs | Uncompetitive | Lowest |
Typical crossover | Below roughly 5,000 - 20,000 parts a year | Above it, once the design is frozen |
The crossover band is wide because it moves with part size, number of cavities and how much flash trimming your geometry creates. Get a real quote for both from the same part file before deciding - a two-hour exercise that regularly changes the answer.
Design rules that differ between the two
Feature | Compression | Injection |
|---|---|---|
Wall thickness | Tolerant of thick and uneven sections | Wants uniform thin walls; thick sections sink |
Draft | Modest draft is usually enough | Draft on every vertical face, plus ejection planning |
Undercuts | Limited; flexible materials can sometimes be stripped | Possible, but each one adds a side action and cost |
Flash | Expected; trimming is a real line item | Minimal on a well-built tool |
Tolerances | Looser | Tighter and repeatable |
Inserts and overmoulding | Straightforward to place by hand | Needs automation or a two-shot tool |
Checklist: choosing a process for a rubber or silicone part
- You know your realistic first-year volume, not your hoped-for one.
- The material family is settled - thermoset or thermoplastic changes everything.
- The design has stopped moving, or you have deliberately chosen cheap tooling because it has not.
- You have quoted both processes from the same CAD file.
- Trimming, secondary operations and scrap are in the unit cost, not just the moulding.
- You have priced what a tool change costs if the part is revised after launch.
The other options people forget to price
The two processes in the title are not the only routes to a rubber-like part, and for the first few thousand units another method is often cheaper and faster. Quote the alternatives at the same time - the comparison usually costs nothing and occasionally saves a tooling budget.
Method | Best volume | Tooling | Trade-off |
|---|---|---|---|
Urethane or silicone casting | 10 - 500 | $500 - $3k per master | Soft tools wear out; cosmetics vary |
3D printed elastomer | 1 - 200 | None | Material choice limited, surface finish |
Transfer molding | 500 - 20,000 | $5k - $20k | Good for inserts; more flash than injection |
Compression molding | 500 - 20,000 | $3k - $12k | Slow cycles, trimming labour |
Injection molding | 20,000+ | $20k - $60k | Highest tool cost, lowest unit cost |
Questions to settle before you release a tool
- Who owns the tool, and can it be moved to another factory?
- How many cavities, and does the quoted unit price assume all of them running?
- What is the quoted flash and trim allowance, and who pays for trimming?
- What tolerance is guaranteed on the critical dimensions, in writing?
- What is the cost and lead time of a typical steel-safe modification?
- What first-article documentation comes with the first shots?
Material families and which process suits them
Half the confusion in this comparison comes from mixing up thermosets and thermoplastics. Thermosets cure irreversibly and are the traditional home of compression molding; thermoplastics melt and re-solidify and are what most injection molding runs. Choose the material family first - it eliminates one of the two processes far more often than the volume calculation does.
Material | Family | Usual process | Typical use |
|---|---|---|---|
Solid silicone rubber | Thermoset | Compression or transfer | Seals, grips, low-volume soft parts |
Liquid silicone rubber | Thermoset | Injection | High-volume medical and consumer soft parts |
EPDM and natural rubber | Thermoset | Compression | Gaskets, bushings, industrial parts |
TPE and TPU | Thermoplastic | Injection | Overmoulded grips, flexible consumer parts |
Composite prepreg | Thermoset | Compression | Structural panels, sporting goods |
Quality control differs as much as the process
Compression parts are inspected as a hand-finished product: flash removal is a person, so variation between operators is real and the inspection plan has to account for it. Injection parts are inspected as a machine output: once the process window is proven, the questions become process drift, cavity-to-cavity variation and short shots. Write the inspection plan for the process you chose, not the one you read about.
- Critical dimensions identified on the drawing, with realistic tolerances for the process.
- First-article dimensional report before any production quantity is released.
- Cavity identification on the part if the tool is multi-cavity.
- Agreed cosmetic standard, including acceptable flash and parting-line witness.
- Sampling plan and AQL level written into the purchase order.
- A retained gold sample held by both you and the factory.
A decision path you can run in ten minutes
Most projects do not need a study to answer this. Work down the questions in order and stop at the first one that gives a clear answer - it is right more often than a spreadsheet built on volume estimates nobody believes.
- Is the material a thermoset? If yes and volume is modest, compression is likely the answer.
- Is the design still changing? If yes, buy the cheap tool - you will be modifying it.
- Is first-year volume under a few thousand? Compression or casting almost always wins.
- Do you need tight tolerances or a cosmetic A-surface? Injection.
- Is the schedule the binding constraint? Compression tooling arrives weeks earlier.
- Is unit cost at scale what decides your business? Injection, once the design is frozen.
Switching from one process to the other later
Starting on compression and moving to injection is a normal, healthy path, but it is a project rather than a purchase order. Expect a design pass to suit the new process, a new tool, requalification of the part, and a period where the two versions differ visibly enough that customers notice. Budget it as a small programme and time it so the changeover does not fall in your peak season.
Task | Typical effort | Note |
|---|---|---|
Design revision for the new process | 1 - 3 weeks | Wall sections, draft, gating |
New tooling | 8 - 14 weeks | The long pole in the schedule |
First articles and requalification | 2 - 4 weeks | Repeat any certification tied to the part |
Inventory bridging | Plan ahead | Build stock to cover the tooling gap |
Cosmetic alignment | Varies | Parting lines and finish will differ |
Terms used in moulding quotes
Term | Meaning | Effect on price |
|---|---|---|
Cavitation | How many parts the tool makes per cycle | More cavities cost more but cut unit price |
Flash | Excess material at the parting line | Trimming is labour, and labour is unit cost |
Steel-safe change | A modification that removes metal from the tool | Cheap; adding metal back is not |
Cure time | How long a thermoset stays in the tool | Sets the cycle, and so the price, in compression |
Gate | Where material enters the cavity | Leaves a mark; position is a design decision |
Shot | One moulding cycle | Tool life is quoted in shots |
Two worked scenarios
Same part, two businesses. The arithmetic below is illustrative, but the shape of the answer holds across most small rubber components.
Scenario A: 2,000 units, design still moving | Scenario B: 60,000 units a year, design frozen | |
|---|---|---|
Right process | Compression | Injection |
Tooling | Around $6k | Around $35k |
Time to first parts | 4 - 6 weeks | 10 - 14 weeks |
Why | Tool cost is recoverable; revisions are cheap | Tool pays back within months on unit cost |
Risk | Higher unit cost limits margin | A late design change is expensive |
If you are somewhere between the two, the cheapest way to decide is to quote both and to ask each supplier what they would change about the part. Our short-run manufacturing and low-volume manufacturing pages cover how first runs are usually structured.
Frequently asked questions
What is transfer molding, and where does it fit?
It sits between the two: material is loaded into a chamber and forced into a closed mould, giving better dimensional control than compression with tooling that costs far less than injection. It is particularly good for parts with metal inserts, which are placed by hand before the shot. For mid-volume thermoset parts it is frequently the right answer that nobody quoted.
Should I buy the tool or let the supplier own it?
Buy it, and get that in writing along with the tool drawings. A tool you own can be moved when a supplier's price, quality or availability changes, and that option is the main leverage a small customer has. Suppliers who fund tooling in exchange for ownership are offering a real cash-flow benefit, but the price is that your product cannot leave.
Is compression molding suitable for medical or food parts?
Yes, and it is widely used for silicone seals and components in both sectors. What matters is the material certification, the cleanliness of the process and the documentation the supplier can provide, not the moulding method itself. High-volume medical silicone parts tend to move to liquid injection for consistency and cycle time, but that is an economics decision.
How do I get a fair quote for either process?
Send the same package to at least three suppliers: a STEP file, a dimensioned drawing marking critical features, the material grade, the annual volume, and the tolerance and cosmetic expectations. Quotes that arrive without questions are usually the ones that change later - a supplier engaging with your geometry is a better sign than a low number.
How long does an injection mould last?
An aluminium tool typically gives tens of thousands of shots; a hardened steel tool runs into the millions with maintenance. For most first products aluminium is the correct answer - it costs less, arrives sooner, and by the time it wears out you will know enough to specify a better steel tool. Abrasive or glass-filled materials shorten these numbers considerably.
Can one tool make more than one version of a part?
Yes, with interchangeable inserts. If two variants differ in one region, a tool can be built with a swappable insert for that area, which is far cheaper than two tools. It has to be planned before the tool is cut - retrofitting an insert pocket into a finished mould is usually not worth doing. Raise it during design optimisation , while the part family is still being defined.
Which process is cheaper for a first production run?
Compression, almost always, for anything under a few thousand parts. The tool is a fraction of the cost and arrives weeks earlier, and the higher unit price is irrelevant across a small quantity. The decision flips once volume is high enough that the injection tool pays back - and once the design has genuinely stopped changing, because a cheap tool is also cheap insurance against revisions.
Does compression molding produce weaker parts?
No. For thermoset rubbers the material properties are comparable, and thick sections are often better in compression because the material is not forced through gates. The real differences are cosmetic and dimensional: more flash, looser tolerances and more visible parting lines. If the part is functional rather than a visible A-surface, those differences rarely matter.
How long does compression tooling take to make?
Typically three to five weeks against eight to fourteen for a comparable injection tool. That schedule difference is often the real reason to pick compression for a first production run - it lets a product reach customers a quarter earlier, and the revenue funds the better tool later. See low-volume manufacturing for how those first runs are usually structured.
Can I use the same part design for both processes?
Rarely without changes. A part drawn for compression usually has sections and tolerances an injection tool will fight, and a part drawn for injection often has thin features that compression cannot fill cleanly. Plan a design optimisation pass at the switch rather than assuming the file transfers.
Services related to this guide
- Best product development companiesHow the leading US firms compare, and which one fits your stage and budget.
- Best product design companiesDesign studios compared by scope, industry and what they hand off.
- Product engineering companiesEngineering firms for physical products compared by discipline, rigor and budget.
- Consultant vs firm vs freelancerWhat each option costs, what it delivers and where to find them.