Multi-Material 3D Printing: Crafting Functionally Graded Prototypes
Discover how Multi-Material 3D Printing enables the creation of functionally graded prototypes by combining diverse materials for advanced, high-performance designs.
October 13, 202511 min read

Written by Ralph Hill, Mechanical & electrical systems, 3D manufacturing
Prototyping Engineer
Published October 13, 2025Updated September 2, 2026
read 4 mins
Multi-Material 3D Printing represents a group of freeform fabrication methods that have become powerful tools for creating materials with precisely designed structures. By forming parts point-by-point, line-by-line, or layer-by-layer, these techniques allow fine control over shape, size, and direction.
Furthermore, they make it possible to build bulk materials with different forms, including porous, cellular, and lattice frameworks. As a result, the structural variation introduced through multiscale Multi-Material 3D Printing often leads to uneven or directional properties.
While major progress has been made in multiscale fabrication, gaining full control across scales — from nano to macro — remains a major challenge.
The Role of Multi-Material 3D Printing
Multi-Material 3D Printing supports these advances by letting users control where each material goes within one printed object. Unlike traditional methods that mix materials together before printing, this method places different materials in specific spots to build complex structures.
However, ensuring strong bonding between materials that don’t naturally stick together is still difficult, both during printing and after. In addition, delivering and using materials efficiently is another important challenge.
For rapid prototyping, realism is essential: the closer a prototype looks and feels to the final product, the faster it can reach the market.
Fortunately, Multi-Material 3D Printing systems make this possible by combining different materials in a single print, allowing for complex, detailed, and working designs.
By mixing materials with opposite traits — like flexibility, rigidity, or conductivity — Multi-Material 3D Printing helps create both prototypes and finished parts ready for real-world use.
(Learn more about additive manufacturing fromMIT’s Center for Additive and Digital Advanced Production Technologies.)
(Learn more about additive manufacturing from
MIT’s Center for Additive and Digital Advanced Production Technologies
Defining Multi-Material 3D Printing
In simple terms, Multi-Material 3D Printing means making one object using two or more separate materials in a single build. Applications range from simple color models to advanced components that combine materials with different physical or chemical traits.
This is different from multi-color printing, which only changes shades of the same material. While Multi-Material 3D Printing may also include color changes, its main goal is to mix useful material properties — rigid, soft, conductive, clear, or resistant — to improve performance in one solid piece.
Key Advantages
- Enhanced Functionality: Hybrid parts can combine flexibility, rigidity, conductivity, and heat resistance for durable, high-performance results.
- Complex Shapes: Soluble support materials (like PVA or RapidRinse) make it possible to create detailed overhangs and inner spaces.
- Less Assembly: Multi-part components can be printed all at once, cutting post-processing time and weak joints.
- Better Look and Feel: Color markings and soft-touch surfaces improve both function and appearance.
As a result, from jigs and fixtures to engineering prototypes and final-use parts, Multi-Material 3D Printing widens what can be made directly on a 3D printer.
To begin with, Material Extrusion pushes slurry or paste-based inks through fine nozzles to form thin filaments or droplets that harden through heat or flow changes. This includes inkjet printing (IJ), direct ink writing (DIW), and fused deposition modeling (FDM). It works with many materials — like thermoplastics, ceramics, metals, and carbon — but keeping smooth flow, small features, and strong structure can still be difficult.
Next, Photopolymerization uses focused light to harden photosensitive resins. Techniques like stereolithography (SLA), digital light processing (DLP), and two-photon polymerization (2PP-DLW) can achieve very fine detail. Moreover, material options keep growing as new resins combine with metals, ceramics, or carbon powders — though particle size and mixing must be managed carefully.
Finally, Energy Deposition melts and joins powders using a laser or electron beam to build 3D forms. Examples include selective laser melting (SLM), laser powder bed fusion (LPBF), laser-engineered net shaping (LENS), and electron beam melting (EBM). These methods, however, often need expensive equipment and precise heat control, but they are great for metal-based Multi-Material 3D Printing at industrial scales.
The Printing Process
As with all additive manufacturing processes, Multi-Material 3D Printing begins with digital design. Modern CAD tools let designers assign materials to specific shapes. Then, correct slicer settings ensure the printer switches materials at the right time, whether using one nozzle, several nozzles, or modular add-ons.
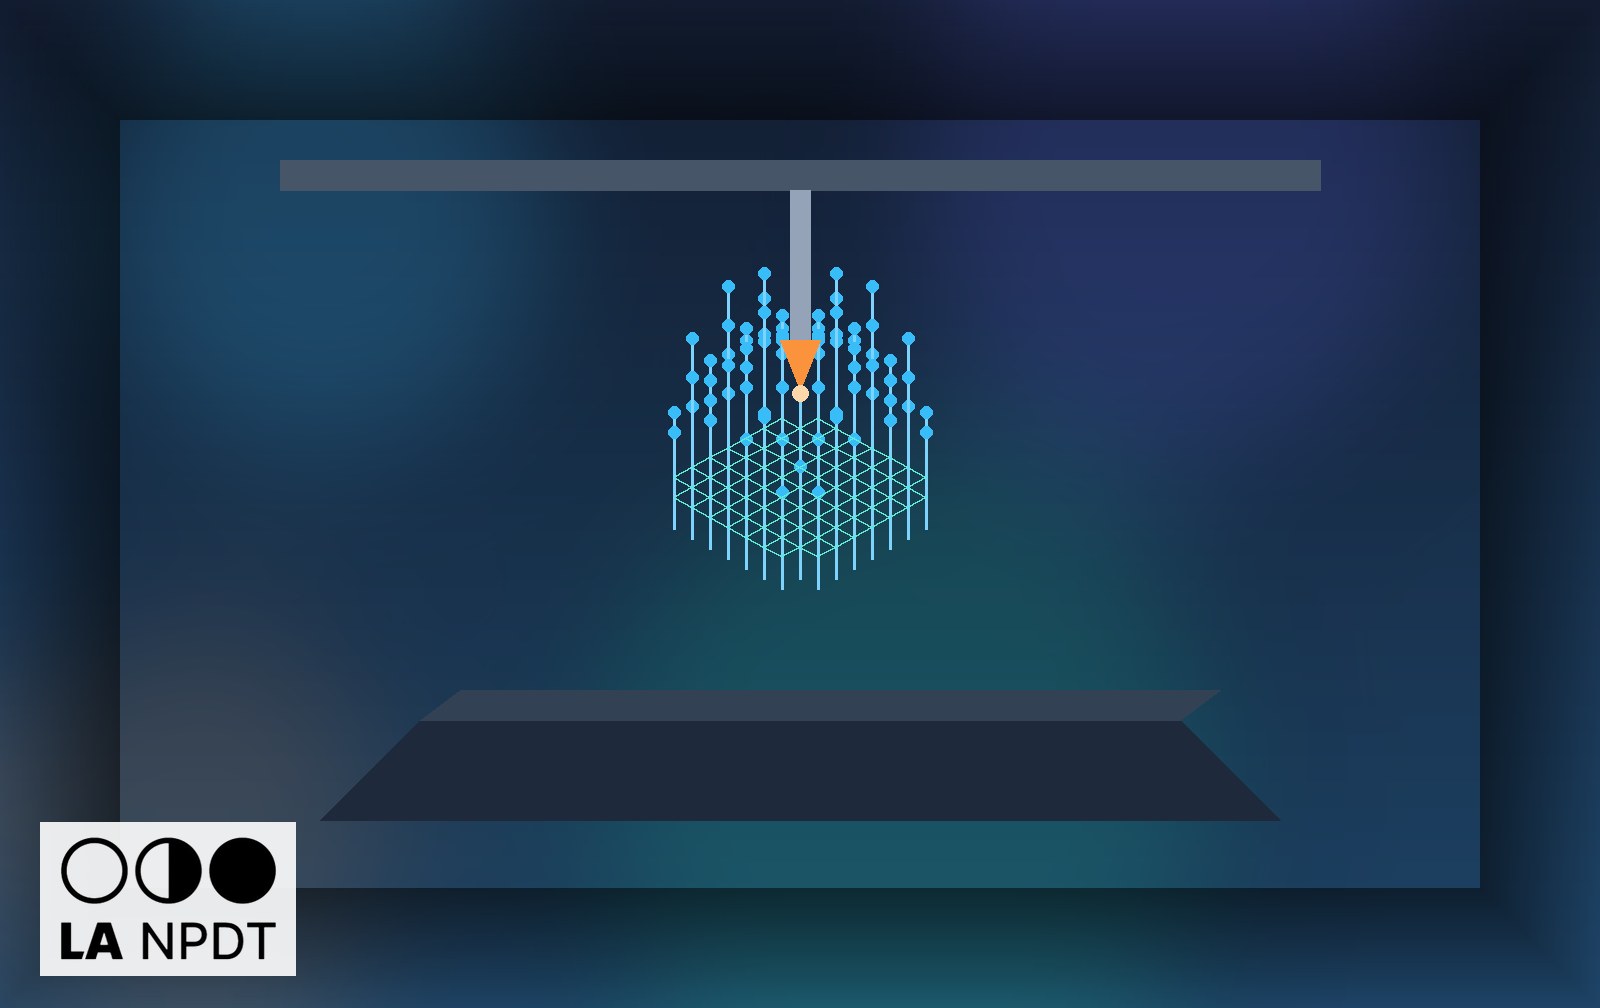
Figure 1. Multi-material / multimode printhead / ink switching example
Contact us today to learn how LA NPDT can assist in realizing your project.
Contact us today to learn how LA NPDT can assist in realizing your project.
The Multi-Material 3D Printing Process
Like all additive manufacturing methods, Multi-Material 3D Printing starts with digital modeling. Modern CAD software lets designers mark where each material should go, while slicer settings guide the printer in changing between them. In some cases, special G-code instructions are needed, depending on whether the setup uses one nozzle, two nozzles, or tool-changing heads.
Applications, Benefits, and Challenges of Multi-Material 3D Printing
The main goal of Multi-Material 3D Printing is to join different material properties — mechanical, visual, or tactile — into one product. For instance, one part may have both glossy and matte areas, or mix fillers for added strength. By blending materials with opposite traits — like stiff and soft, or heat-resistant and flexible — designers can boost both performance and appearance while reducing extra steps after printing.
For example, Multi-Material 3D Printing is used in many areas:
• Microfluidics — where precise material control helps form tiny channel networks.
• Robotics and Soft Robotics — where flexible and rigid zones must work together.
• Medical Devices — where soft TPU and strong carbon fiber can combine to make lightweight prosthetics.
Still, keeping consistent results takes careful setup. Each material needs a different nozzle and bed temperatures, print speeds, and retraction settings. Without proper tuning, issues like clogging, dripping, or poor bonding may occur — especially in single-extruder printers or when using unusual filaments like wood- or metal-filled blends.
Types of Printing Solutions
- Dual-Extruder Systems
Pros: Reliable and easy to use with fast print times (e.g., UltiMaker systems with optimized slicer profiles).
Cons: Limited to two materials per print. - Single-Nozzle Multi-Material Feeders
Pros: Cost-effective and supports several materials or colors with little hardware change.
Cons: Creates more waste, takes longer to print, and works best with materials having similar melting and bonding behavior. - Tool-Changing Systems
Pros: Very flexible, using separate nozzles and materials.
Cons: Slower and more complex, so better for research than industrial work.
(For industrial examples, explore advanced Multi-Material 3D Printing usingStratasys’ PolyJet technology, which offers high-resolution, full-color, and multi-material printing.)
(For industrial examples, explore advanced Multi-Material 3D Printing using
Stratasys’ PolyJet technology
, which offers high-resolution, full-color, and multi-material printing.)
Best Practices for Multi-Material 3D Printing Success
- Keep moisture-sensitive materials (like PVA, nylon, TPU) in dry boxes.
• Clean nozzles regularly to avoid mixing or clogs.
• Recalibrate nozzle offsets and level the bed after material changes.
• Adjust purge tower settings to reduce waste while maintaining smooth color and material transitions.
• Design clear material boundaries and interlocking shapes for stronger bonding.
• Test with small calibration prints before scaling up.
• Slow down print speeds during material changes for a smoother finish.
Conclusion
In short, great designs need both creativity and precision. Multi-Material 3D Printing speeds up this process, helping teams test ideas quickly while lowering development costs. Furthermore, new smart materials will open even more options — replacing gears or motors with parts that move or react by themselves.
In the near future, smart and biocompatible materials will continue to change industries, leading to Multi-Material 3D Printing that evolves into 4D printing, where parts can reshape or adapt over time. This breakthrough could transform medicine, manufacturing, and robotics by allowing for custom implants or adaptive tools.
To conclude, Multi-Material 3D Printing is much more than a technical innovation — it is a key to the next generation of design and production.
Subscribe
Dive deep into the dynamic world of new product development with LA NPDT Insights Blog.
Recent Posts
Geopolitical Risk in New Product Development
Component Lifecycle Management: Designing for Obsolescence
Material Qualification Strategy: Reducing Risk Before Production
Bridging Digital and Physical Prototyping
Systems Thinking in Hardware Development
You used Chatgpt to develop a product idea. Now what?
Subscribe
Dive deep into the dynamic world of new product development with LA NPDT Insights Blog.
Recent Posts
Geopolitical Risk in New Product Development
Component Lifecycle Management: Designing for Obsolescence
Material Qualification Strategy: Reducing Risk Before Production
Bridging Digital and Physical Prototyping
Systems Thinking in Hardware Development
You used Chatgpt to develop a product idea. Now what?
Multi-material 3D printing processes compared
Process | Materials it combines | Resolution | Typical part cost | Best used for |
|---|---|---|---|---|
Dual-extrusion FDM | Two rigid polymers, or rigid plus TPU | 0.1-0.3 mm layers | $20-$200 | Living hinges, gaskets, soluble supports |
PolyJet multi-material | Rigid, rubber-like and clear photopolymers, blended | 16-30 micron layers | $150-$1,200 | Overmoulded look-alike models, gradient durometer parts |
Multi Jet Fusion with post-dyeing | Nylon with colour finishing | 80 micron layers | $30-$400 | Durable functional parts needing appearance control |
SLA with material swap | Multiple resins in sequential builds | 25-100 micron layers | $60-$600 | Two-tone housings, discrete stiff and flexible zones |
Composite FDM with continuous fibre | Nylon plus carbon, glass or Kevlar fibre | 0.1-0.2 mm layers | $100-$900 | Load-bearing brackets and jigs |
Material extrusion with metal filament | Metal green parts, sintered after printing | 0.1-0.2 mm layers | $200-$2,000 | Metal functional prototypes without machining |
These processes sit inside a broader toolkit. Our rapid prototyping service selects the process against the question being asked, prototype design prepares the geometry for it, and design for manufacturing translates a graded prototype into a mouldable production part.
Frequently asked questions
What is multi material 3D printing?
It is additive manufacturing that deposits two or more distinct materials within a single build, so one part can be rigid in one region and flexible in another, or opaque with a transparent window. The advanced case is functional grading, where the transition between materials is gradual rather than abrupt, producing stiffness gradients that are difficult or impossible to achieve with conventional moulding.
Is multi material 3D printing suitable for production parts?
For low volumes and specialised applications, yes; for mainstream consumer volumes, rarely. Photopolymer blends in particular degrade under UV and lose elastomeric performance over time, so they are excellent for evaluation models and poor for products expected to last years outdoors. Nylon and continuous-fibre composites are the exceptions that do hold up in service.
How much does a multi-material prototype cost?
A dual-extrusion FDM part with a soft gasket region typically costs twenty to two hundred dollars. A PolyJet model with graded durometer and clear elements more often lands between one hundred fifty and twelve hundred dollars depending on volume and finishing. The price premium over single-material printing is roughly two to four times, which is usually still cheaper than producing two parts and an assembly step for evaluation purposes.
Can multi-material prints replace overmoulding in prototypes?
For appearance, ergonomics and basic function, yes, and that is precisely where they earn their cost: you get an overmoulded feel without cutting two tools. What they do not replicate is the bond strength and long-term adhesion of true two-shot moulding, so any grip or seal that must survive cycling should still be validated on production-representative parts before launch.
Which process to use for which part
Multi material 3d printing is not one technology. Four families can place more than one material in a single build, and they differ by an order of magnitude in resolution, cost, and how well the interface between materials actually bonds. Choose by the property you need at the boundary, not by printer availability.
Process | How materials combine | Typical resolution | Interface strength | Best use |
|---|---|---|---|---|
Dual/multi-extruder FFF | Separate nozzles per material | 0.1-0.3 mm layer | Moderate, mechanical | Rigid + flexible functional prototypes |
PolyJet / material jetting | Jetted photopolymer droplets | 14-30 micron layer | Strong, chemically fused | Overmold look-alike, graded durometer |
DLP / SLA multi-vat | Resin swap between regions | 25-100 micron | Variable, needs clean swap | Optical and fine-feature parts |
Directed energy deposition | Blended powder feed | 0.5-2 mm bead | Metallurgical gradient | Functionally graded metal parts |
Material pairings that actually bond
The single most common failure in a two-material print is delamination at the interface. Chemistry, not geometry, decides most of it — polar and non-polar polymers will not bond no matter how much interlock you design in.
Pairing | Bond quality | Notes |
|---|---|---|
PLA + PVA | Good | Water-soluble support for internal channels |
PLA + TPU (95A) | Fair | Needs mechanical interlock; keep TPU dry |
PETG + TPU | Good | Similar processing temperatures |
ABS + HIPS | Good | HIPS dissolves in limonene |
Nylon + almost anything | Poor | Low surface energy; use interlocks only |
Rigid + rubber-like photopolymer | Excellent | Jetted resins cure into each other |
Design rules for graded and multi-material parts
- Never rely on a flat butt joint between materials; add dovetails, pins, or a 1-2 mm interpenetrating lattice.
- Grade durometer in at least three steps rather than one hard-to-soft jump.
- Keep the soft material in compression where possible; adhesive interfaces are weakest in peel.
- Allow 0.15-0.25 mm clearance for any moving interface printed in place.
- Orient the part so the material boundary is not parallel to the peel direction of the load.
- Design purge towers or prime pillars into the build for every nozzle swap on FFF.
- Model each material as a separate solid body, not as a face colour, so slicers assign extruders correctly.
Cost and lead time reality
Multi-material builds are slower than single-material builds of the same volume because of purge, tool changes, or vat swaps. Budget for the machine time, not just the material.
Part | Process | Build time | Material cost | Typical service price |
|---|---|---|---|---|
Handheld enclosure, rigid + grip overmold | PolyJet | 9-14 h | $60-$110 | $300-$650 |
Same part | Dual-extruder FFF | 18-26 h | $12-$25 | $90-$220 |
Sealed housing with soft gasket | PolyJet | 6-9 h | $40-$80 | $220-$450 |
Microfluidic manifold with soluble cores | FFF + PVA | 20-30 h | $18-$35 | $140-$300 |
Graded metal transition joint | DED | 3-6 h | $180-$400 | $1,200-$3,000 |
Troubleshooting the usual failures
Symptom | Likely cause | Fix |
|---|---|---|
Materials separate at the boundary | Incompatible chemistry | Add mechanical interlock or change pairing |
Colour or material bleed | Insufficient purge volume | Increase purge tower size, slow the swap |
Stringing between regions | Wet filament, high retraction gap | Dry filament, tune retraction per material |
Idle nozzle oozing onto the part | No ooze shield | Enable ooze shield and nozzle wipe |
Warping of the rigid section | Mismatched shrinkage rates | Raise chamber temperature, add brim |
Soft section tears in test | Layer boundary aligned with load | Reorient the build or thicken the transition |
Pre-print checklist
- Confirm both materials tolerate the same chamber and bed temperature window.
- Dry hygroscopic materials (TPU, nylon, PVA) for at least four hours before the build.
- Verify nozzle offsets with a calibration print before committing a long job.
- Assign each body its material in CAD and re-check assignments in the slicer.
- Add a purge tower and ooze shield for every material transition.
- Print a 40 mm interface coupon and pull-test it before printing the full part.
- Record settings per material so a successful build can be repeated.
Used well, multi-material printing collapses two prototype iterations into one: a single build gives you form, grip, seal, and fit at the same time. Our rapid prototyping team specifies these builds as part of the wider product development process.
Frequently asked questions
What is multi material 3D printing?
It is any additive process that places two or more distinct materials inside a single build, so one part can be rigid in one region and flexible, transparent, soluble, or conductive in another. The materials are assigned per body in CAD and deposited or cured region by region.
Which printers can print two materials at once?
Dual- and multi-extruder FFF machines are the accessible option; PolyJet material jetting systems give the best resolution and the strongest interfaces; multi-vat DLP and directed energy deposition cover fine resin parts and graded metals respectively.
Why do my two materials keep separating?
Almost always chemistry. Nylon and most low-surface-energy polymers will not bond to anything. Either switch to a compatible pairing such as PETG with TPU, or design a mechanical interlock — dovetails, pins, or a short interpenetrating lattice — so the joint carries load in shear rather than peel.
Is multi-material printing more expensive than assembling parts?
Per prototype, yes on machine time but usually cheaper overall, because you avoid fixtures, adhesives, and a second setup. At production volumes the comparison flips and overmolding wins, so treat multi-material printing as a development tool rather than a manufacturing path.
What is a functionally graded prototype?
A part whose material properties change gradually across its geometry rather than at a hard boundary — for example durometer stepping from 95A to 40A across 10 mm, or a metal joint transitioning between two alloys. Grading spreads stress across the transition instead of concentrating it at a single plane.
How long does a multi-material print take?
Expect 1.5-2x a single-material build of the same volume. A handheld enclosure with a grip overmold runs roughly 9-14 hours on PolyJet and 18-26 hours on dual-extruder FFF, with purge and tool changes accounting for most of the difference. Choosing a multi material 3D printing process Not every multi-material machine gives you the same properties. Match the process to what the prototype has to prove.
Filed under:EducationUncategorized
Tagged:2025
Services related to this guide
- Best prototyping companiesDevelopment firms, instant-quote bureaus and local shops — who fits which job.
- Free prototype cost calculatorFive to eight questions, an instant cost range for a first prototype.
- Prototype development companiesWhich firms take a sketch to a working prototype — and which only fabricate parts.
- Rapid prototypingWorking prototypes in days, from 3D printing to vacuum casting.