Demo behind a $100K+ raise
Enclosure Design: Purivy UV Phone Sanitizer
- ENCLOSURE DESIGN
- INDUSTRIAL DESIGN
- 3D PRINTING
- RAPID PROTOTYPING
- DESIGN FOR MANUFACTURING
- ELECTRONICS INTEGRATION

Written by Ralph Hill, Mechanical & electrical systems, 3D manufacturing
Prototyping Engineer
Published August 30, 2026
Enclosure design is the mechanical and industrial design of the housing that turns working electronics into a product: the shape a user holds, the internal features that locate boards and components, the seals and light or water barriers, the user interface openings, and the geometry that lets the part be manufactured at volume.
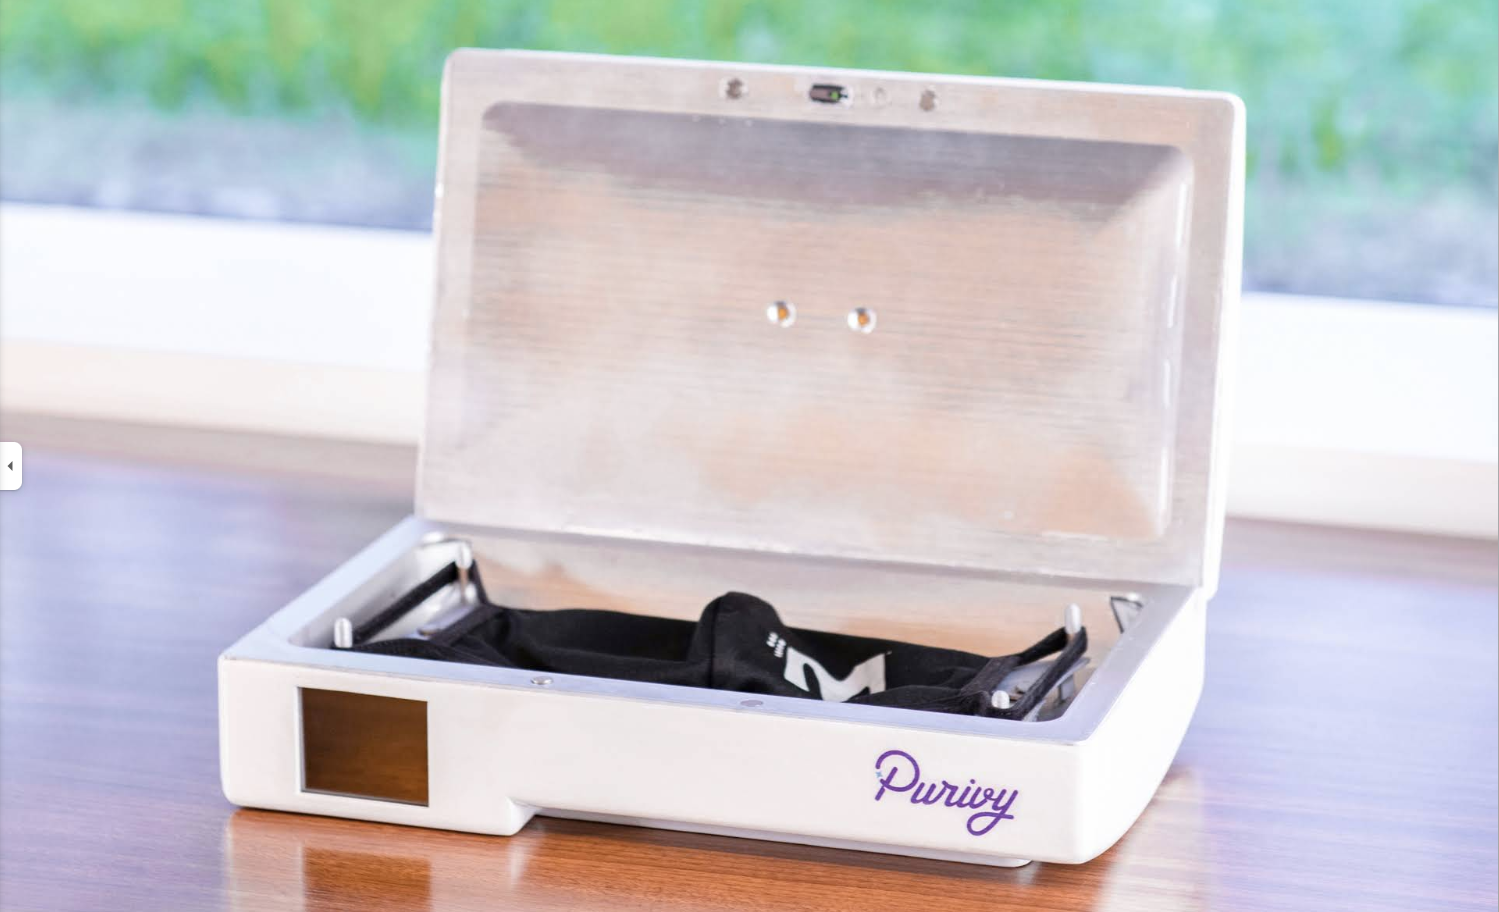
Purivy is a UV-C sanitizing case for phones, earbuds, watches and remotes. Founder Naor Amir supplied working UV lamp and control electronics; LA NPDT designed the clamshell enclosure around them, iterated it in 3D printed prototypes, and delivered a finished demo unit the company used to raise over $100,000.
Project at a glance
- Client
- Naor Amir, founder and CEO of Purivy (South Florida)
- Product
- UV-C sanitizing clamshell case for phones, earbuds, watches and remotes
- Starting point
- Working UV and control electronics, no housing and no CAD
- Program focus
- Enclosure design and a funding-ready demo prototype
- What we delivered
- Industrial and mechanical design, production-intent CAD, multiple 3D printed iterations, one finished demo unit
- Methods
- 3D printing, iterative fit checks, design for manufacturing
- Stage reached
- Demo prototype used in investor meetings and product photography
- Outcome
- Over $100,000 raised; selected for FPL's 35 Mules startup program
What the client said
★★★★★
“Konstantin and his team are an absolute joy to work with. Their technical expertise is top notch, great communication, and really committed to ensuring your project reaches its full potential.
Will definitely continue working with them to engineer and prototype our current product as well as future ones down the line!”
 Naor AmirCEO, PurivyGoogle review
A UV sanitizing case for phones, earbuds and remotes — electronics supplied by the client, everything around them designed and prototyped by LA NPDT.
The client
The challenge
- Design around fixed electronics. The boards, the UV lamp and the wiring already existed, so the enclosure had to be built to them rather than the other way around.
- Contain the UV. UV-C is only safe behind a closed barrier. The lid, the parting line and the hinge all had to block light escaping, and the lamp only runs when the lid is shut.
- Fit a phone, and more than a phone. The internal cavity was sized around large-format phones, which also makes it right for earbud cases, watches, remotes and keys.
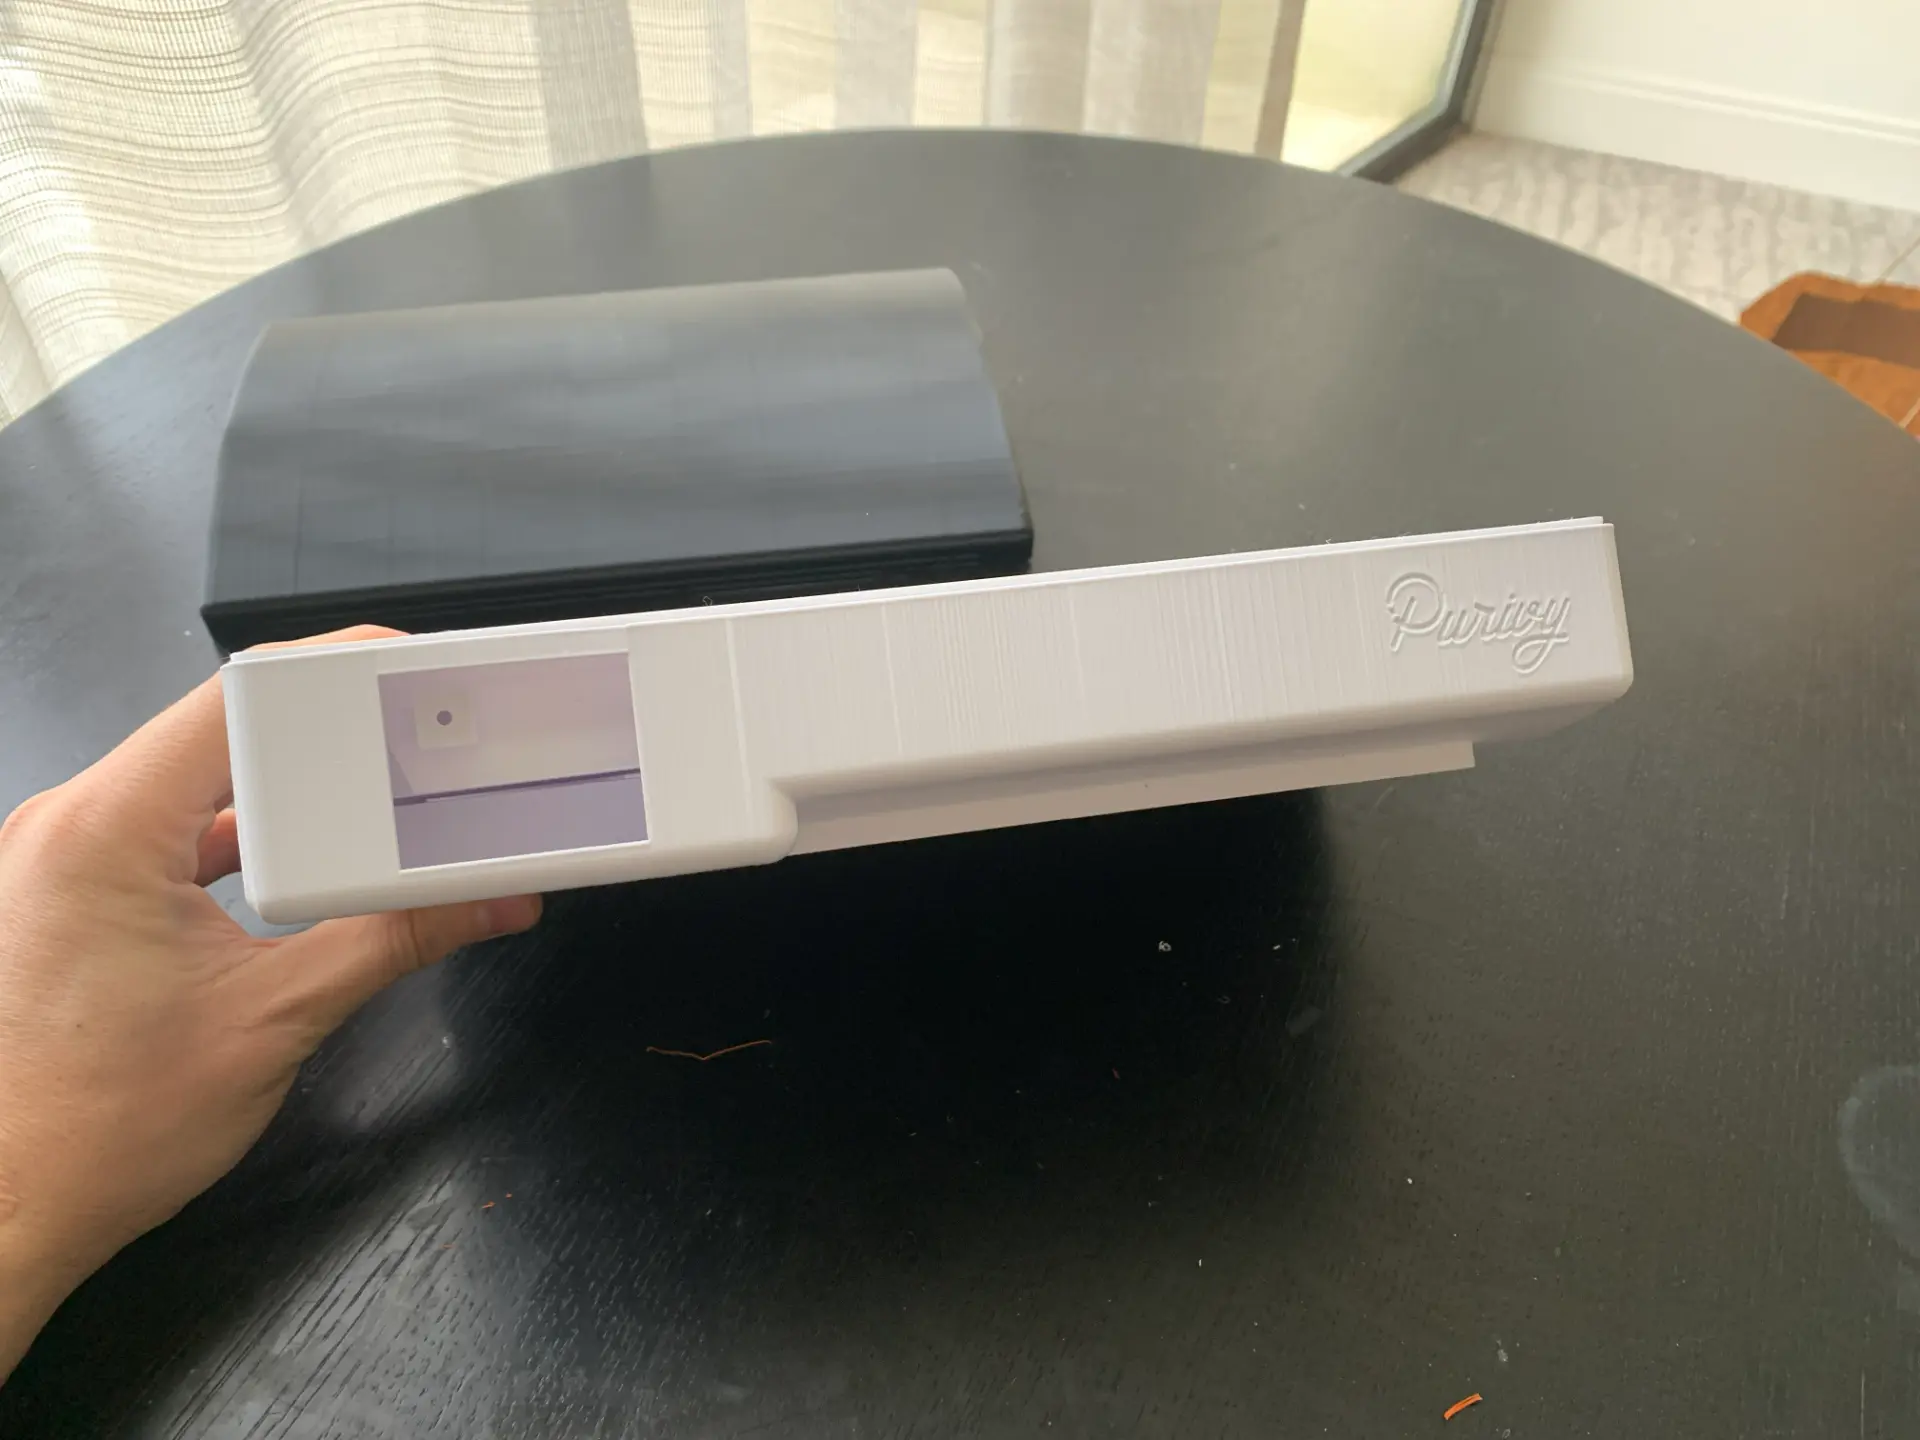
- Look finished, not printed. A funding demo is judged on appearance. Surfaces, radii, the parting line and the embossed logo all had to read as a product.
- Be fast. The prototype existed to support a raise, and a raise runs on a calendar.
- Be manufacturable later. The geometry had to survive the eventual move to injection molding rather than being a print-only shape.
Our solution
Designing a Custom Enclosure Around Existing Electronics
3D Printing as the Iteration Engine
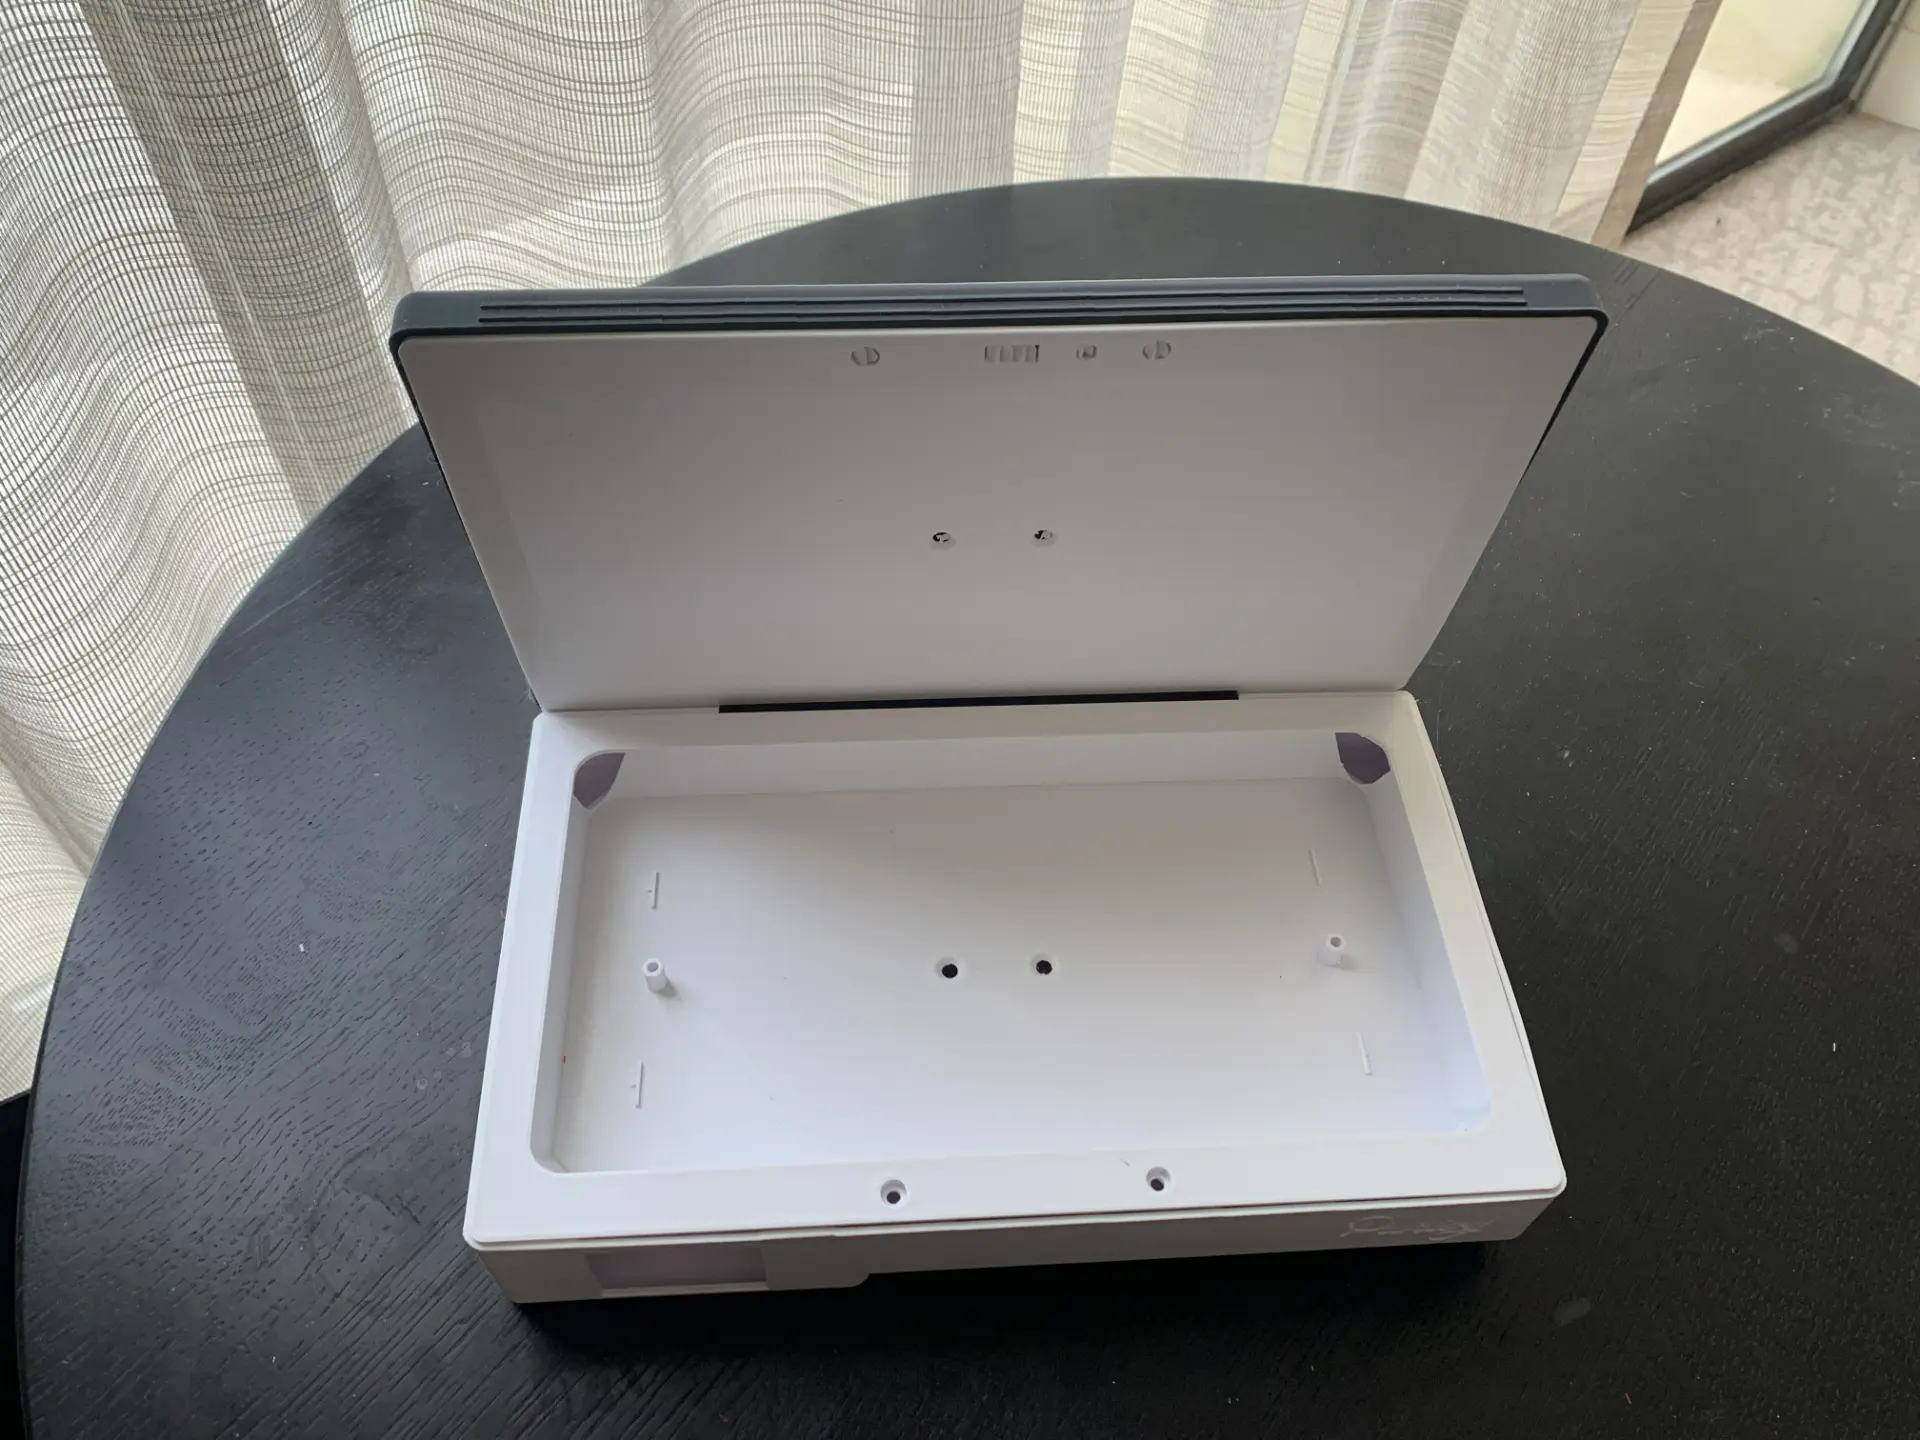
- Fit checks first. Tray, bosses and standoffs printed and test-assembled with the client's actual boards and lamp before any cosmetic work.
- Then the mechanism. Hinge geometry and the lid closing action were tuned over successive prints until the lid felt deliberate rather than loose.
- Then the surface. The demo unit was printed, filled, sanded and finished so the client could photograph it and put it on a table in front of investors.
- Design for manufacturing throughout. Draft, uniform wall sections, snap and boss placement were kept molding-friendly so the same CAD can move to injection tooling without a redesign.
The result
What the Client Received
- Industrial and mechanical design of the full clamshell enclosure around the supplied electronics
- Production-intent CAD with bosses, standoffs, hinge, light-blocking lip and status window
- Multiple 3D printed iterations for fit, mechanism and appearance
- A finished, photographable demo prototype used for fundraising and investor meetings
- Design-for-manufacturing guidance for the move to injection molding
- Engineering and electronics integration advice throughout, from one team in one place
Capabilities used on this project
Rapid prototyping services
3D printing, CNC machining, urethane casting and functional prototype builds with published materials, tolerances and lead times.
How a custom electronic enclosure gets designed and prototyped
The order the decisions have to be made when the electronics already exist and the product around them does not.
1. Model the electronics as fixed inputs
Board outlines, connector positions, lamp geometry, wiring runs and thermal behaviour are constraints, not variables. They get modelled first so the housing is grown outward from real volumes rather than drawn and then forced to fit.
2. Decide the split line before the styling
Where the enclosure parts, how it opens and how it closes drives everything downstream. Purivy is a clamshell: a lower tray that carries the boards and the device cavity, an upper lid that carries the lamp and closes onto a light-blocking lip.
3. Solve the physics the product exists for
For a UV sanitizer that means containing UV-C light. Lid overlap, parting-line geometry and a lid-closed interlock keep the lamp from running on an open box, and the interior is shaped to bounce light onto the device rather than absorb it.
4. Add the internal features early, not last
Bosses, standoffs, ribs, snap features, cable channels and the status window are what actually decide whether the electronics fit. They are placed in the first CAD revision so the first print is a real fit check.
5. Iterate in 3D printed parts
Printed iterations answer fit, hinge feel, lid stop angle, window alignment and wall thickness in days. Each round assembles with the client's real boards, so every question is settled by a part in the hand rather than a screen.
6. Finish one unit as a demo, not a print
The last iteration is filled, sanded and finished so it photographs as a product. A funding demo is judged on appearance, and layer lines read as unfinished to an investor.
7. Keep the geometry molding-ready
Draft angles, uniform wall sections and sensible boss and snap placement are maintained throughout, so the same CAD can move to injection molding without a redesign when volume justifies tooling.
| Off-the-shelf project box | Custom designed enclosure | |
|---|---|---|
| Fit to your electronics | Boards adapted to the box | Box designed to the boards |
| Appearance | Generic — reads as a prototype | Branded product with its own form |
| Function-specific features | None — drilled and modified by hand | Hinge, light seal, window and mounts built in |
| Investor and user demos | Weak | Photographs and demos as a real product |
| Path to production | Dead end | Same CAD moves to injection molding |
| Up-front cost | Lowest | Design cost, repaid at first tooling |
Questions about this project
Straight answers from the engineers who ran the build. Have a different question? Ask us directly.
Talk to an engineerCan you design an enclosure around electronics I already have?
Yes, and it is one of the most common ways projects reach us. We model your boards, lamp, battery, connectors and wiring as fixed volumes, then design the housing around them. If something about the electronics makes the enclosure much harder or more expensive to build, we tell you and suggest the smallest change that fixes it.
What does enclosure design cost?
For a consumer device of this size, expect roughly $4,000 to $12,000 for industrial and mechanical design plus a few printed iterations, depending on how many parts the assembly has and how much appearance work the demo unit needs. Tooling for injection molding is a separate, later cost.
How long does it take to get a demo prototype?
Typically three to six weeks from a first call to a finished unit, when the electronics already exist. Design, printing and finishing run in one place in Ruston, Louisiana, so iterations move in days rather than waiting in queues between vendors.
Is a 3D printed enclosure good enough for investors?
A well-finished printed enclosure is exactly what most seed-stage demos use. It looks and behaves like the product, it can be photographed, and it can be revised cheaply. Investors fund evidence that the product can exist, not production parts.
Will the printed design work for injection molding later?
It will if it is designed for it from the start. We hold draft angles, uniform wall thickness and molding-friendly boss and snap geometry through the prototype phase, so moving to tooling is a review rather than a redesign.
Is UV-C safe inside a consumer product like this?
UV-C is effective against surface microbes and unsafe for skin and eyes, which is why containment is a design requirement rather than a feature. The enclosure blocks light at the parting line and the lamp only runs with the lid closed.
Industries this project belongs to
See how we approach development in each of these categories, and the other products we have taken from sketch to production there.