Mold Flow Analysis: How It Cuts Injection Molding Cost
Injection molding cost is decided by tool steel, cavity count, geometry, resin and tolerances long before the first shot. Here is what each lever is worth and which savings are safe.
February 28, 20266 min read

Written by Konstantin Dolgan, Ph.D., NPDP
Founder & CEO, Product Development Engineer
Published February 28, 2026Updated September 2, 2026
Mold flow analysis is the cheapest hour you will spend on a tool. Simulating fill, packing and cooling before steel is cut exposes the warpage, sink marks and short shots that otherwise surface as a $12,000 tooling rework.
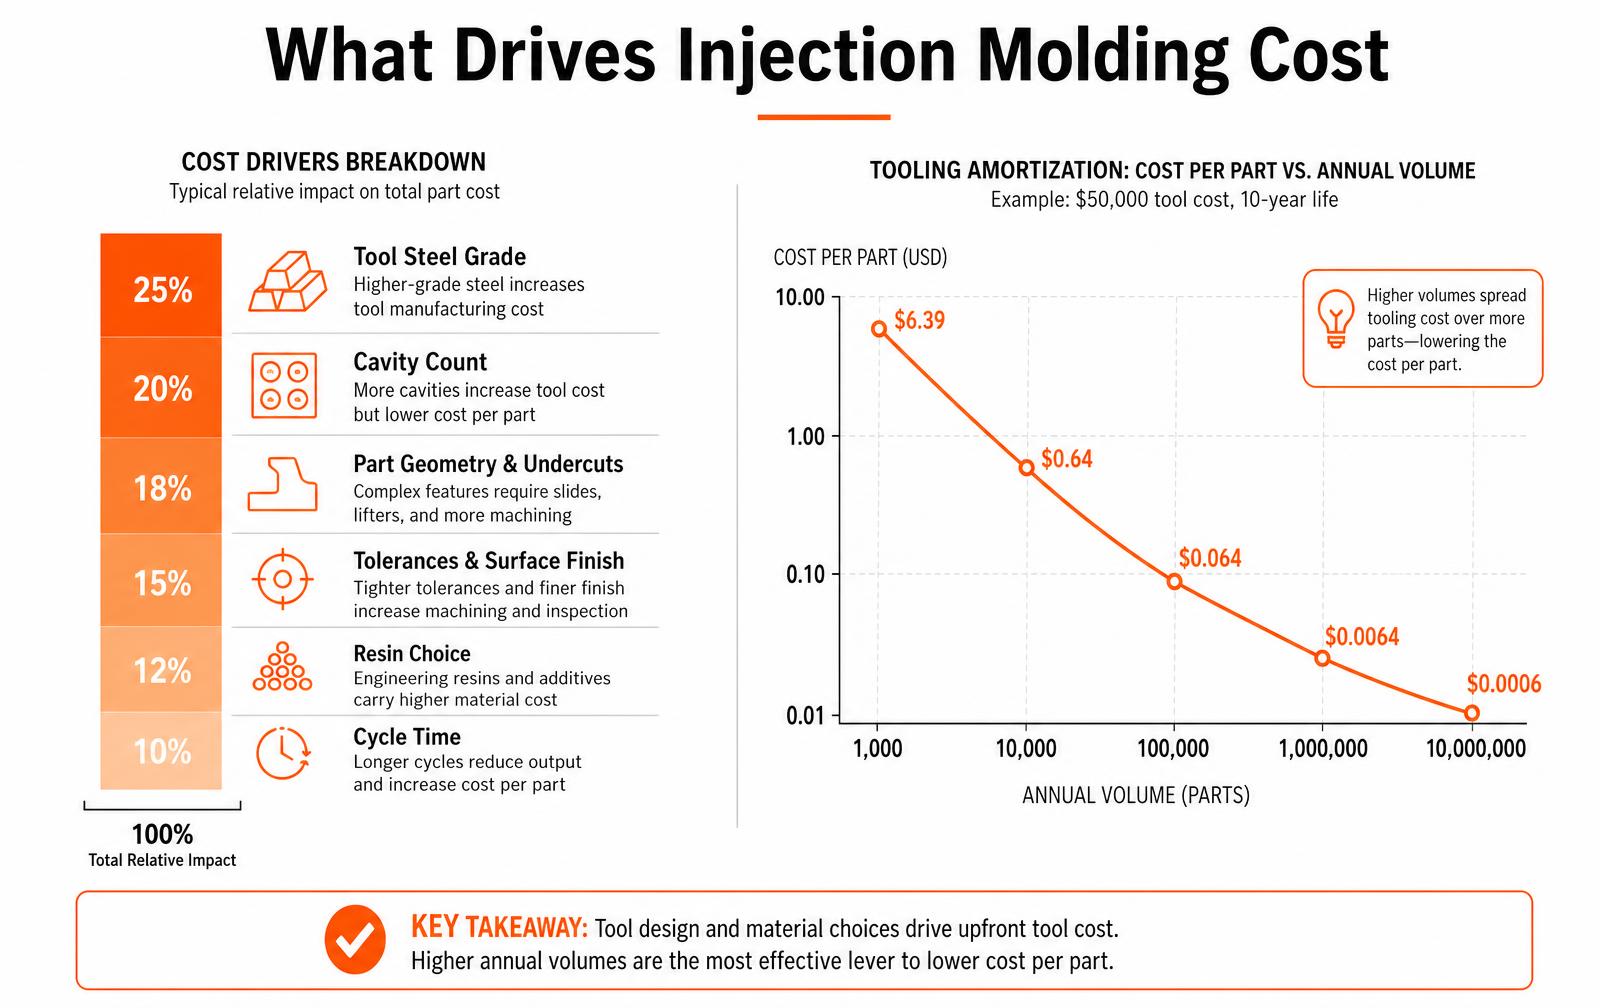
Injection molding cost still has two halves - a one-time tool of roughly $3,000 to $100,000 and a per-part price of $0.10 to $10 - and both are set in CAD by cavity count, steel grade, geometry, resin and the tolerances you write on the drawing.
The two numbers in every molding quote
Cost element | Typical range | What moves it |
|---|---|---|
Aluminum prototype / bridge tool | $3,000 to $12,000 | Part size, single cavity, simple geometry, 1,000 to 10,000 shot life |
Production steel tool, single cavity | $12,000 to $40,000 | P20 or H13 steel, side actions, textured finish, 500,000+ shot life |
Multi-cavity or family tool | $40,000 to $150,000+ | Cavity count, hot runner, complex slides, tight tolerance |
Part price at volume | $0.10 to $10 | Resin cost, shot weight, cycle time, cavity count, secondary operations |
Tooling is amortized. A $40,000 tool over 10,000 parts adds $4.00 per unit; over 500,000 parts it adds $0.08. That single division decides whether a more expensive, faster, longer-lived tool is the cheap option or the expensive one.
Cavity count: the biggest single lever
A four-cavity tool costs roughly two to three times a single-cavity tool, not four times — but it produces four parts per cycle. At volume that collapses machine time per part, which is usually the largest component of the piece price after resin.
- Under about 10,000 parts per year, a single cavity almost always wins.
- Between 10,000 and 100,000, two to four cavities is the common answer.
- Above 250,000, eight to thirty-two cavities with a hot runner is normal, and the tool becomes a capital asset with a maintenance plan.
Get the annual volume estimate honest before this decision. Over-tooling for a forecast that never arrives is the most expensive mistake in the category, and it is not recoverable — you cannot un-cut steel.
Tool steel and tool life
Tool material | Typical shot life | Relative tool cost | Fits |
|---|---|---|---|
Aluminum (7075, QC-10) | 1,000 to 10,000 | Lowest | Prototypes, bridge production, market tests |
P20 pre-hardened steel | 250,000 to 500,000 | Moderate | Most consumer and industrial production parts |
H13 hardened steel | 1,000,000+ | High | High volume, abrasive glass-filled resins, long product life |
Stainless (420 SS) | 500,000+ | High | Medical, corrosive resins such as PVC, clean-room parts |
Abrasive resin is the detail people miss. A 30% glass-filled nylon will erode a soft tool quickly, so the correct comparison is not aluminum versus steel on day one — it is aluminum plus a mid-life retool versus steel once.
Geometry: what actually adds cost to the mold
- Undercuts requiring side actions, lifters or unscrewing cores — each mechanism adds thousands of dollars and a failure mode.
- Uneven wall thickness, which causes sink, warp and long cooling cycles. Keep walls uniform, typically 1.5 to 3 mm, and core out thick sections.
- Missing draft. One to two degrees per side is nearly free in CAD and expensive to add after steel is cut; textured surfaces need more.
- Deep ribs and tall bosses that need extra cooling and slow the cycle.
- Cosmetic A-surfaces with a specified texture or high polish, which raise both mold finishing labor and scrap rate.
Most of these are free to fix during design for manufacturing review and expensive to fix in hardened steel. A DFM pass before the tool is cut typically pays for itself several times over on the first engineering change avoided.
Resin choice
Material is a per-part cost that never goes away, and prices differ by an order of magnitude. Commodity resins such as PP, PE and ABS sit at the low end; engineering resins such as PC, nylon, POM and PEEK climb quickly. But resin selection also changes cycle time, shrinkage, tool wear and whether you need a hot runner, so the cheapest pellet is not always the cheapest part.
- Match the resin to the actual duty cycle and environment, not to a datasheet maximum.
- Check shrink rate early — it determines cavity dimensions, and switching resin families after the tool is cut can mean a new tool.
- Colorant, flame-retardant and UV packages add cost and can affect strength and cycle time.
- Regrind policy is negotiable and materially changes the piece price on non-cosmetic parts.
Tolerances: where drawings quietly buy money
Every tight tolerance on a drawing is a purchase order. Standard commercial molding tolerances run roughly ±0.1 to ±0.25 mm depending on feature size and resin; tighter than that requires better steel, tighter process control, more inspection and higher scrap.
Tolerance class | Typical range | Cost effect |
|---|---|---|
Commercial | ±0.13 to ±0.25 mm | Baseline |
Fine | ±0.08 to ±0.13 mm | Higher tool cost, added inspection |
Precision | ±0.025 to ±0.08 mm | Hardened steel, tight process window, elevated scrap rate |
The discipline is simple: tolerance the two or three features that mate with something, and leave the rest at commercial. Blanket-tightening a drawing because it feels safer is one of the most common self-inflicted cost increases in plastic parts.
Where you can safely cut tooling cost
- Start with a bridge tool. An aluminum tool proves the market and the design, then production steel gets cut with real data.
- Reduce cavity count rather than tool quality when volume is uncertain — you can build a second tool later; you cannot un-spend a bad one.
- Design out side actions by relocating features to the parting line or using shut-offs.
- Combine parts where assembly labor exceeds tooling savings, or split a complex part into two simple tools.
- Use a family tool for parts of similar size, wall and resin that ship in matched sets.
- Own your tool and your CAD. Free or subsidized tooling usually prices the ownership back into the piece price, and it makes moving suppliers expensive.
Where cutting cost usually backfires
- Choosing a soft tool for an abrasive glass-filled resin and paying for a retool mid-program.
- Skipping DFM to save two weeks, then paying for steel welding and an engineering change.
- Accepting no process documentation or inspection data, which makes a supplier change nearly impossible later.
- Specifying a cosmetic finish on a surface nobody sees.
Getting value from a flow study
- Run it on the actual resin grade you plan to mold, not a generic family.
- Include the intended gate options so the study compares them.
- Ask for cycle time and cooling recommendations, not just fill results.
- Share results with the toolmaker before steel is ordered.
- Re-run it if the wall thickness or resin changes materially.
Key takeaways
- Run mold flow after geometry stabilizes and before steel is cut.
- Cycle time findings affect piece price for the tool's entire life.
- Use the real resin grade; generic material data misleads on warpage.
Planning a molded part and want the tooling cost right the first time?
Work with LA NPDT: if you are moving from here to execution, start with our low-volume manufacturing or talk to us about design for manufacturing.
Frequently asked questions
How much does injection molding cost?
Tooling typically runs $3,000 to $12,000 for an aluminum prototype tool, $12,000 to $40,000 for a single-cavity production steel tool, and $40,000 to $150,000 or more for multi-cavity or hot-runner tools. Piece price usually falls between $0.10 and $10, driven by resin cost, shot weight, cycle time and cavity count.
Why are injection molds so expensive?
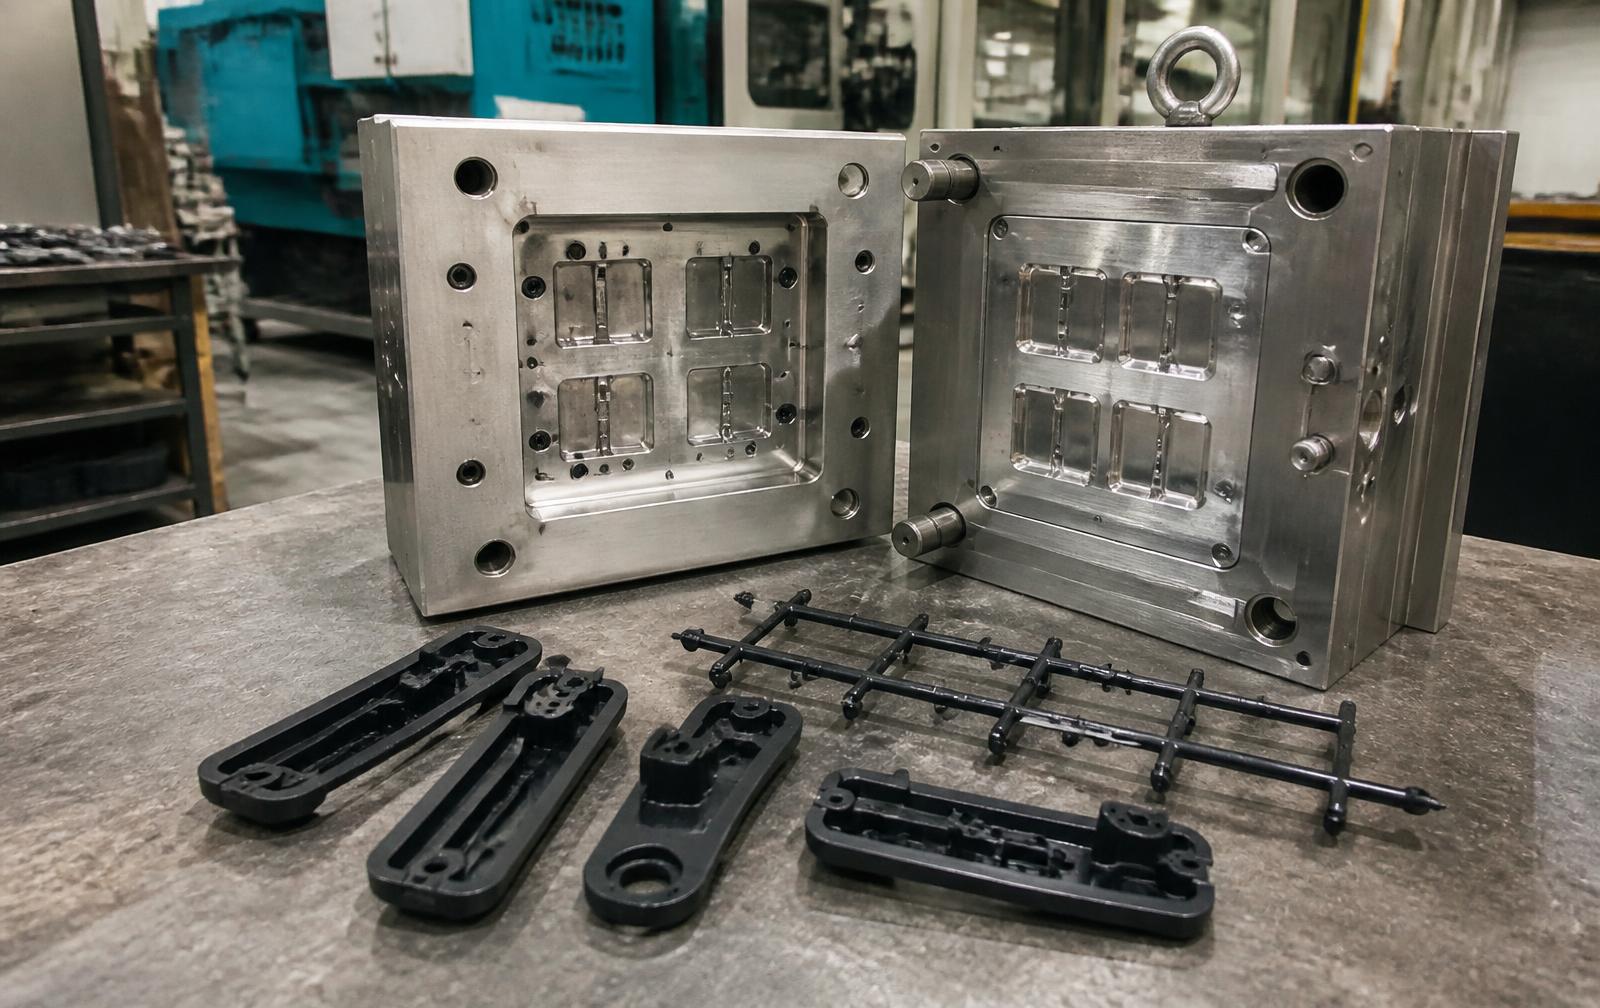
A mold is a precision machined steel assembly that has to hold tolerance for hundreds of thousands of cycles under high pressure and temperature. The cost is skilled machining, hardened steel, cooling channel design, and every mechanism such as a slide or lifter needed to release features that do not pull straight out of the tool.
At what volume does injection molding become cheaper than 3D printing?
The crossover is commonly in the low thousands of parts, though it depends on part size and tool cost. Below roughly 500 to 1,000 units, printing or urethane casting usually wins; above a few thousand the amortized tool cost per part drops below printing cost and molding wins decisively.
Does cavity count reduce cost per part?
Yes. A four-cavity tool costs about two to three times a single-cavity tool but produces four parts per cycle, so machine time per part falls sharply. The tradeoff is a larger upfront investment that only pays back if the volume forecast is real.
How do tolerances affect injection molding cost?
Commercial tolerances of roughly ±0.13 to ±0.25 mm are baseline. Fine tolerances require better steel and added inspection; precision tolerances near ±0.025 mm require hardened steel, a tight process window and higher scrap rates. Tighten only the features that mate with something else.
How long does it take to get an injection mold made?
Aluminum prototype tools typically take two to four weeks. Production steel tools generally run six to twelve weeks, plus one to three weeks of sampling and process qualification before parts are approved for production.
Should I own my injection mold?
Yes, whenever possible. Owning the tool and the CAD lets you move production if a supplier's quality, price or lead time slips. Subsidized or free tooling almost always recovers the cost through a higher piece price and makes a supplier change expensive.
What a mold flow study tells you before steel is cut?
Mold flow analysis is cheap relative to a tool modification, and it answers questions that otherwise surface only after the first shots. Gate location, fill balance, weld line position and warpage prediction all come out of a study that typically takes days. Run it after the part geometry stabilizes and before the toolmaker orders steel.
What the analysis predicts and what it saves?
Cycle time is the prediction with the longest tail. A study that finds a cooling layout saving two seconds per shot changes the piece price for the entire life of the tool — which on a high-volume part dwarfs the cost of the analysis many times over.
Filed under:EducationUncategorized
Tagged:2025
Services related to this guide
- Free prototype cost calculatorFive to eight questions, an instant cost range for a first prototype.
- Prototype designLooks-like, works-like or pre-production: what each proves and what it costs.
- Rapid prototypingWorking prototypes in days, from 3D printing to vacuum casting.
- Best product development companiesHow the leading US firms compare, and which one fits your stage and budget.